A Git branch is a lightweight, movable pointer that points to a specific commit in your repository. It is not a folder, and it is not a copy of your project. Creating one takes a fraction of a second because Git only writes a new 41-character reference, which is exactly why this guide on git branching explained for beginners matters: the whole model collapses once you accept that a branch is just a name pointing at history.
Most beginner tutorials bury that idea under theory. This one starts with the pointer model, walks a full ten-command workflow on one small practice project so you can watch the graph change after every command, then covers merging, conflicts, forks and the mistakes that cost people their work. Everything here runs in a terminal, works on Git 2.23 or newer, and needs nothing beyond a text editor.
Table of Contents
- What Is a Git Branch?
- How Do Git Branches Work?
- What does the default branch have to do with it?
- Git Branching Explained for Beginners: A Basic Workflow
- Step 1: Make sure you are on main and clean
- Step 2: Pull so your base is current
- Step 3: Create and switch to a feature branch
- Step 4: Edit the file and check the diff
- Step 5: Stage and commit
- Step 6: Look at the graph
- Step 7: Switch back to main
- Step 8: Merge the feature into main
- Step 9: Confirm what is now merged
- Step 10: Delete the finished branch
- How to Create, Switch, Rename, and Delete Branches
- How to Merge a Branch
- Fast-forward merge: when main never moved
- Three-way merge: when the branches diverged
- What Happens When Branches Conflict?
- Branches vs Forks, Clones and Tags
- Merge vs Rebase: When Each One Is Safe
- Which Branching Strategy Should You Use?
- Getting your branch onto a remote
- Common Beginner Branching Mistakes
- 1. Committing to the wrong branch
- 2. Bundling unrelated changes into one commit
- 3. Force-pushing over shared history
- 4. Deleting unmerged work with -D
- 5. Branching from the wrong base
- 6. Long-lived feature branches
- 7. Forgetting that switching resets the working tree
- Frequently Asked Questions
- What does merge conflict mean in Git?
- How do I fix a conflict in git merge?
- Do Git branches duplicate my code?
- What is the difference between git switch and git checkout?
- What is the difference between a branch and a tag?
- Are local branches and remote branches the same thing?
- Should beginners use Git Flow?
- What happens to uncommitted changes when I switch branches?
- Conclusion: Start With One Feature Branch
What Is a Git Branch?
A branch is a movable pointer to a commit. That is the whole definition. Every commit in Git gets a unique identifier (a 40-character SHA hash), and a branch is simply a file in the .git/refs/heads folder containing one of those hashes.
When you type git commit, Git creates the commit object, then moves the pointer of whatever branch you are currently on forward to point at it. That is the whole mechanism behind “committing to a branch.”
So no, a branch does not duplicate your code. Creating twenty branches on a large repository costs twenty tiny text files, not twenty copies of your source tree. That answer comes up constantly in beginner threads on r/learnprogramming, where the copy myth is the reason people are scared to branch at all.
Why bother, then? Because the pointer model lets you move main forward and backward cheaply. You can hold a working version in one pointer while you build an unfinished feature in another, and swap between them in under a second. That is how a team keeps the default branch deployable while shipping features and urgent fixes in parallel.
One more piece you will meet early: HEAD. HEAD is itself a pointer, and it points at the branch you are standing on right now. If git status says you are on feature/search, HEAD points at the feature/search pointer. When you commit, HEAD follows the branch and both move forward.
How Do Git Branches Work?
Think of a repository as four layers: your working directory (the files you edit), the staging area (what git add queues up), the repository database (every commit ever made), and the working tree checkout (what the files look like right now). Branching only touches the last layer and the pointers, which is why it is instant.
You can see the entire structure with one command. Set it up as a shell alias so you never retype the long form:
git config --global alias.graph "log --graph --oneline --decorate --all"
Then call it with git graph. Here is what a small repository looks like after a couple of commits on main:
* 9f2c1ab (HEAD -> main) Add notes list to index page
* 4b7e0d3 Add notes.txt with two entries
* a10c4f8 First commit: empty project
Each line is one commit, newest at the top. The * marks the commit HEAD currently sits on, and (HEAD -> main) tells you that pointer main and HEAD are both parked on commit 9f2c1ab. A branch name with parentheses next to it means that pointer lives there.
Now create a branch and commit to it:
git switch -c feature/search
* 9f2c1ab (HEAD -> feature/search) Add notes list to index page
| * 4b7e0d3 Add notes.txt with two entries
|/
* a10c4f8 First commit: empty project
That is the moment to understand. Creating the branch did not copy anything, but the graph now shows two lines because we rewound to the older commit 4b7e0d3 on the new branch. Two commits later, the two lines diverge and every commit from that point on belongs to its own line until you merge them.
Git stores this as a directed acyclic graph. The |/ line is where the two histories split, and a merge later adds a commit with two parents that stitches them back together. If you take one thing from this section, take this: branches are lines on a graph, commits are dots on those lines, and git graph is how you read it.
What does the default branch have to do with it?
Your default branch (usually main, sometimes still called master on older repositories) is just another pointer, with no special storage. What makes it special is convention and, on GitHub and GitLab, branch protection rules that block direct pushes. That protection is the reason beginners are told not to work on main: the pointer is easy to move locally, but a protected branch makes the move go through review.
Git Branching Explained for Beginners: A Basic Workflow
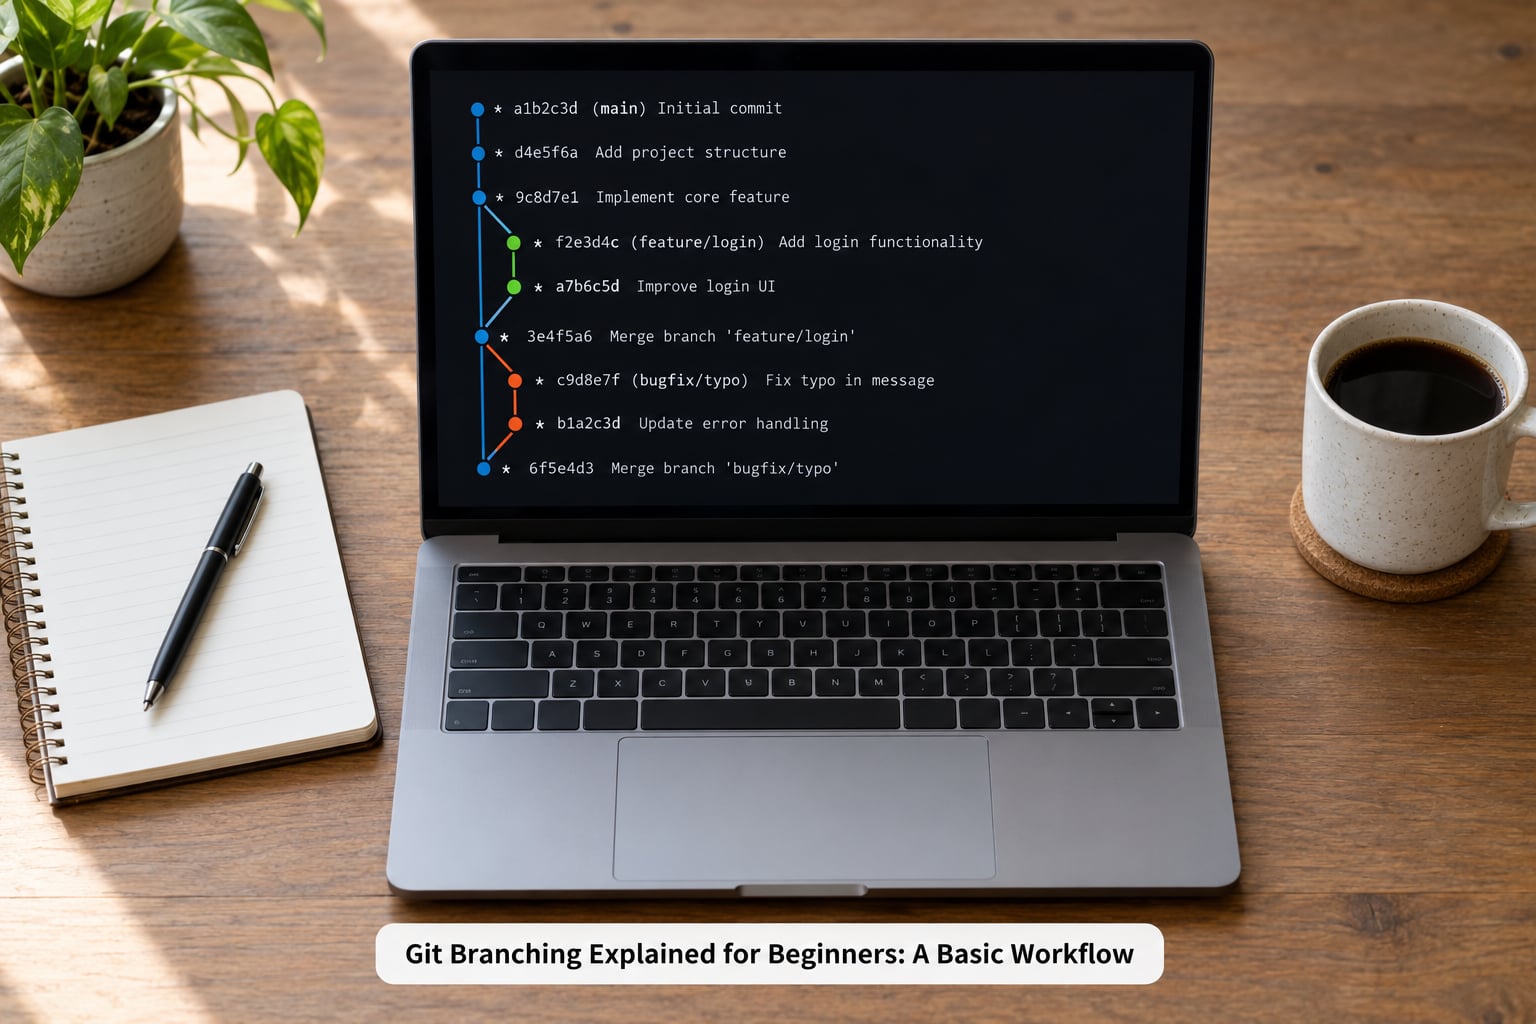
Here is the workflow you will actually repeat, run against a tiny practice project called notes-app with one file, notes.txt. Start from a clean slate with an empty file and follow the ten steps in order. Each step tells you what to type and how to confirm it worked.
Step 1: Make sure you are on main and clean
git switch main
git status
git status should end with nothing to commit, working tree clean. If it does not, you have uncommitted changes, and they will follow you to whatever branch you switch to.
Step 2: Pull so your base is current
git pull
This fetches from the remote and merges. A Already up to date. line means nothing new arrived.
Step 3: Create and switch to a feature branch
git switch -c feature/search
The -c flag means create. This creates feature/search at your current commit and moves HEAD onto it in one step. To confirm, run git status again: the first line reads On branch feature/search.
Step 4: Edit the file and check the diff
git diff
Red lines are removed, green lines added. This is the fastest way to catch the classic mistake of switching branches mid-edit and writing the wrong version.
Step 5: Stage and commit
git add notes.txt
git commit -m "Add search helper function"
Run git status after: a clean working tree is your confirmation that the commit landed.
Step 6: Look at the graph
git graph
You should see a new commit sitting on feature/search while main still points at the older one. That two-line picture is the normal state of affairs while a feature is in progress.
Step 7: Switch back to main
git switch -
The lone dash returns you to the branch you were on before. Your files change on screen to match main, because switching resets the working tree to that branch’s last commit. Nothing was deleted; you are just looking at a different point in history.
Step 8: Merge the feature into main
git merge feature/search
Since main had not moved, Git simply slid its pointer forward. Output reading Fast-forward is the success message, and no new commit object was created.
Step 9: Confirm what is now merged
git branch --merged
Every branch listed here is fully contained in your current branch, which means deleting it loses nothing.
Step 10: Delete the finished branch
git branch -d feature/search
The lowercase -d deletes only if the work is already merged. Your git graph output now shows a single straight line again.
Practise that loop five times with five different small features and the mechanics will stop feeling like anything special. They are not special. It is one pointer copied, one pointer moved, one pointer slid forward.
How to Create, Switch, Rename, and Delete Branches
These are the commands you will type daily. Learn them in this form first, then treat checkout as the legacy spelling.
git switch -c feature/searchcreates a branch at the current commit and switches to it.git switch mainmoves HEAD to an existing branch.git switch -returns to the branch you were on before, without typing its name.git branchlists every local branch, with an asterisk next to the current one.git branch -aadds your remote-tracking branches to that list.git branch -m old-name new-namerenames the branch you are currently on.git branch -d namedeletes a merged branch safely.git branch -D namedeletes a branch even if its commits are unmerged. Read the rest of this section before you ever type it.
| Command | What it does | When it fails |
|---|---|---|
git switch | Moves HEAD to a branch and resets the working tree to match | Refuses if uncommitted edits would be overwritten |
git checkout -b name | Identical to git switch -c name | Same conditions; works in Git versions older than 2.23 |
git checkout branch | The old way to switch branches | Same refusal; also carries a second meaning (restore a file) that trips people up |
git restore notes.txt | Discards uncommitted changes to one file | Nothing to do; unrelated to branches despite the similar name |
git switch and git restore arrived in Git 2.23 in 2019. Before that, git checkout did all three jobs, which is why older tutorials and most video tutorials from a few years back still use it. If your git switch command is not recognised, check git --version and upgrade, or use git checkout -b.
On the delete commands: Git checks whether the tip of the branch is an ancestor of your current branch before -d will remove it. If it is not, you get error: The branch 'x' is not fully merged and nothing changes. That check is the only thing standing between you and losing the only pointer to a day’s work, which is why -D should be a deliberate act, not muscle memory. There is a recovery path, and it is covered in the mistakes section below.
You can preview the check yourself without deleting anything: git branch --merged lists the safe deletions, and git branch --no-merged lists the ones Git would refuse.
How to Merge a Branch
A merge takes the commits from one branch and makes them part of another. You almost always run it while standing on the destination branch, so first step: switch back to where the work should land.
git switch main
git merge feature/search
There are two outcomes, and Git picks between them for you based on history rather than on flags.
Fast-forward merge: when main never moved
A fast-forward happens when your current branch has no new commits of its own, so Git can just slide the pointer. No new commit is created, and history stays as one straight line. That is the case in step 8 of the walkthrough above.
Three-way merge: when the branches diverged
If both branches have commits, Git cannot slide a pointer, so it looks at three things: your branch tip, the incoming branch tip, and the common ancestor where they split. That is a three-way merge, and it produces a merge commit with two parents:
*   7d3a9b1 (HEAD -> main) Merge branch 'feature/dark-mode'
|
| * 2e5f8c3 (feature/dark-mode) Add dark colour variables
| * 8b1c4d0 Add theme toggle button
* | 91d2a7e Update notes.txt formatting
|/
* 4b7e0d3 Add notes.txt with two entries
The | and / characters show the two parents joining at the merge commit 7d3a9b1. Both lines of work are now in main.
If you prefer every merge recorded as a commit even when a fast-forward would do, git merge --no-ff feature/search forces the merge commit. Teams that review history with git log --graph often set this as the default, because it makes it obvious which features were merged when.
Verify any merge with git log --oneline --graph --decorate and read the shape. If your feature line joins into main cleanly with no stray duplicates, it worked.
What Happens When Branches Conflict?
A merge conflict means Git found two changes to the same lines of the same file and refuses to guess which one you meant. It is not damage and it is not a failed merge; it is Git stopping to ask. Conflicts show up mostly when two branches survive more than a couple of days and touch the same file.
Git marks the contested lines in the file itself:
<<<<<<< HEAD
body { background: #ffffff; color: #222222; }
=======
body { background: #111111; color: #eeeeee; }
>>>>>>> feature/dark-mode
Read the markers like this: everything between <<<<<<< HEAD and ======= is your current branch’s version, and everything between ======= and >>>>>>> feature/dark-mode is the incoming branch’s. The seven-character markers at the top and bottom are the labels.
Resolving a conflict takes the same five steps every time.
- Open the conflicted file.
git statuslists every file Git is waiting on. - Delete the marker lines and keep what you want. You can keep one side, both, or rewrite the lines entirely.
- Stage the file with
git add notes.txt. Git stops tracking it as unmerged once it is staged. - Run
git diff --checkor search the file for<<<<<<<to confirm no markers survive. - Finish with
git commit. The merge commit message Git pre-fills is fine as-is.
If you would rather click through a visual tool, git mergetool opens each conflicted file in a merge-aware editor. Beginners on Windows often find the built-in git mergetool route easier than hand-editing markers on a first project.
And if you would rather walk away from a bad merge entirely, git merge --abort puts the repository back exactly as it was before you typed git merge. Knowing that command exists is what makes experimenting with branches safe.
Forum threads on r/learnprogramming describe people losing entire hackathon projects to conflicts they did not understand. The reassurance worth taking from that is not that conflicts are rare, but that they are fully reversible until the moment you run git commit on the resolved file.
Branches vs Forks, Clones and Tags
These four words get mixed up constantly, and they are not variants of each other. A table settles it faster than prose.
| Thing | What it actually is | Moves? | Shared with the team? |
|---|---|---|---|
| Branch | A pointer to a commit inside your repository | Yes, every commit moves it | Only if you push it |
| Clone | A full local copy of a remote repository | No | It is your local copy to work in |
| Fork | Your own server-side copy of someone else’s repository | No | Yes, via a pull request back to the original |
| Tag | A fixed, named pointer to a specific commit | No, unless you force it | Yes, when you push the tag |
The fork-versus-branch confusion has a simple test. If you push to the repository yourself and you have write access, you want a branch. If you cannot push there, or you should not be changing that project directly, you want a fork and then a pull request.
Tags deserve one line of their own because beginners use them as branches by accident. A branch is a sticky note you keep moving as the work progresses. A tag is a commemorative plaque for one specific commit, used for releases such as v1.2.0. If you find yourself checking out a tag to continue working, you wanted a branch.
Merge vs Rebase: When Each One Is Safe
Merging preserves history exactly as it happened. Rebasing replays your commits on top of a different base, which produces a tidy straight line and rewrites the commits’ identifiers.
The rule people repeat across r/git, AskProgramming and GitHub community discussions is short: rebase your own private work, never commits other people already have. Rewriting history that has been pushed changes every commit hash, so your teammates’ copies stop matching and the whole thing turns into a bad afternoon for everybody.
| Approach | Result | Rewrites history? | Safe on pushed work? |
|---|---|---|---|
| Fast-forward merge | Pointer slides, single line | No | Yes |
| Merge commit | New commit with two parents | No | Yes |
| Rebase | Your commits replayed onto another base | Yes | Only on branches nobody else has pulled |
You can leave rebase alone for your first few months. Merges alone will carry you, and every beginner branching guide that survives contact with real projects treats rebase as a second-stage skill rather than a starting one.
Which Branching Strategy Should You Use?
A branching strategy is just an agreed set of branch names and rules for how work travels toward production. Three cover almost everything.
| Strategy | Branch layout | Picks this if | Watch out for |
|---|---|---|---|
| GitHub Flow | main plus short-lived feature branches | You deploy constantly and want the simplest thing that works | No staging area; you rely on feature flags if a feature needs to land unfinished |
| GitLab Flow | main, plus staging and production | You want an environment you can test before the live one | More moving parts and more merges to reason about |
| Git Flow | main, develop, feature, release, hotfix branches | You maintain versioned software with formal releases | Heavy for small teams; long-lived branches invite enormous merges |
If you are learning alone, use GitHub Flow without apology: one long-lived main, one short feature branch at a time, merge and delete. Forums discussing branching best practice tend to reach the same conclusion for small teams, and the author of Git Flow himself has said the model fits fewer situations than it used to.
Getting your branch onto a remote
Local branches do not exist on GitHub until you push them. This is where a lot of beginners’ first pull request stalls, because they assumed pushing main pushed everything.
git push -u origin feature/search
The -u flag sets upstream tracking, so later pushes on that branch can be plain git push. After that, git branch -r lists your remote-tracking branches, which are your local records of what the server has. The -a flag on git branch shows both local and remote-tracking names.
On the web side, GitHub and GitLab both let you branch from a pull request page and protect main so it only accepts changes through reviewed pull requests. Branch protection is what makes “keep main deployable” a rule rather than a hope.
Common Beginner Branching Mistakes
Most branching pain comes from the same handful of behaviours. Each one has a fix, and three of them have a recovery route if you have already done it.
1. Committing to the wrong branch
It happens because nobody checked where they were. Run git status before you stage anything. If it already happened, move the commit to the right branch with git branch wrong-name (to freeze the current pointer), git reset --hard HEAD~1 (to step back one commit), git switch -c right-name, then git cherry-pick the commit hash you just abandoned. Cherry-pick applies one specific commit anywhere, which is also how you take a colleague’s single fix without merging their whole branch.
2. Bundling unrelated changes into one commit
A commit is one idea. Fixing a typo in the README while adding a database migration produces a commit nobody can review or revert. Stage file by file with git add file-by-file before each commit instead of git add ..
3. Force-pushing over shared history
git push --force overwrites the branch on the server with your version. When someone else has commits from that branch, those commits are gone from the remote. Use git push --force-with-lease instead: it refuses if the remote moved since your last fetch, which turns a data-loss mistake into a rejected push you can read.
4. Deleting unmerged work with -D
git branch -D name removes the pointer even though the commits may exist nowhere else. The commits do not actually vanish, because Git keeps a log of where every pointer has been. Run git reflog within a couple of weeks, find the hash after your last commit on that branch, then git switch -c rescue name using that hash. The branch is back, commits and all.
5. Branching from the wrong base
Starting a feature branch while main was three commits behind means your pull request carries unrelated changes. Check git status is clean, git switch main, git pull, and only then git switch -c feature/x.
6. Long-lived feature branches
A branch left open for three weeks accumulates merges nobody reviewed, then explodes into conflicts. Short-lived branches merged daily are boring, which is the goal. If a branch is dragging, rebase it onto main before opening the pull request, while it is still private to you.
7. Forgetting that switching resets the working tree
Beginners often think uncommitted edits disappeared after a branch switch. They did not, but Git will not switch if those edits would be overwritten by the target branch, so you may see error: Your local changes would be overwritten. To carry uncommitted work across a switch, use git stash, switch, then git stash pop.
Frequently Asked Questions
What does merge conflict mean in Git?
A merge conflict means Git found two changes to the same lines of the same file and will not guess which version you want. It stops the merge and marks the contested lines inside the file with u0026lt;u0026lt;u0026lt;u0026lt;u0026lt;u0026lt;u0026gt;u0026gt;u0026gt;u0026gt;u0026gt;u0026gt;u0026gt; branch-name. Nothing is lost and nothing is broken. You choose the lines you want, delete the markers, run git add on the file, and commit to finish the merge. Git merges files that only one branch touched automatically, without any conflict at all.
How do I fix a conflict in git merge?
Run git status to see which files are unmerged, then open each one. Between the u0026lt;u0026lt;u0026lt;u0026lt;u0026lt;u0026lt;u0026gt;u0026gt;u0026gt;u0026gt;u0026gt;u0026gt; marker is the incoming branch. Delete the marker lines and keep or rewrite what you want, then stage each resolved file with git add. Check the file has no leftover markers, and finish with git commit. If you would rather click through a visual editor, git mergetool opens each conflicted file for you.
Do Git branches duplicate my code?
No. A branch is a lightweight, movable pointer to a specific commit, not a folder and not a copy of your repository. Creating one writes a single reference file containing a commit hash, which takes milliseconds regardless of project size. Your working files are checked out from whichever branch HEAD points at, so switching branches changes what you see on disk without copying anything. You can hold dozens of branches in a project the same way you hold a single copy of the files.
What is the difference between git switch and git checkout?
Functionally, very little for branch work. git switch -c feature/search creates and switches in one step, while the older git checkout -b feature/search does the same thing. git switch was added in Git 2.23 in 2019 to split checkout into clearer commands: switch for branches, restore for file changes. Old tutorials and most videos still use checkout because of this. If your terminal rejects git switch, check git u002du002dversion and either upgrade Git or keep using the checkout form.
What is the difference between a branch and a tag?
A branch moves as you commit, while a tag stays pinned to one commit forever. Think of a branch as a sticky note you keep sliding forward, and a tag as a commemorative plaque for a release such as v1.2.0. Tags are how you mark the exact commit that shipped, which is why tooling and deployment scripts point at tags rather than branches. If you check out a tag expecting to keep working, you have made a mistake: create a branch from that tag instead.
Are local branches and remote branches the same thing?
No. A local branch exists only on your machine until you push it, and a remote-tracking branch is your local record of what the remote repository holds. Push a branch for the first time with git push -u origin feature/search; the -u flag links your local branch to the remote one so later pushes can just be git push. List what the server has with git branch -r, or both sets with git branch -a. This is the step most beginners miss before their first pull request.
Should beginners use Git Flow?
Probably not yet. Git Flow assumes a team maintaining versioned software with formal release branches, a develop branch, hotfix branches and release branches. For a solo learner or a small team deploying frequently, that is a lot of ceremony, and long-lived branches make merges harder rather than easier. Start with GitHub Flow: one main branch and one short-lived feature branch at a time, merged and deleted the same day. Most teams that grow into formal releases adopt a heavier strategy deliberately, not by accident.
What happens to uncommitted changes when I switch branches?
They stay in your working directory and travel with you, as long as switching will not overwrite them. Git refuses to switch when the target branch has different content in the same file, and you get an error about local changes being overwritten. If you want the edits to follow you anyway, run git stash, switch branches, then git stash pop to bring them back. Uncommitted work is never silently deleted by a branch switch, which is one reason people over-worry about branching.
Conclusion: Start With One Feature Branch
If this guide on git branching explained for beginners leaves you with one habit, make it this six-step loop. Check git status and confirm you are clean on main, run git pull, create git switch -c feature/thing, commit small focused changes, run git switch - back to main, merge with git merge feature/thing, and verify with git graph before deleting.
Do that on a small practice project until the graph output reads as naturally as ls. After that, the rest of branching is variation on the same theme: pointers, merges, and knowing which branch you are standing on. This guide is kept current for 2026, and the commands here work unchanged in any terminal on Git 2.23 or newer.