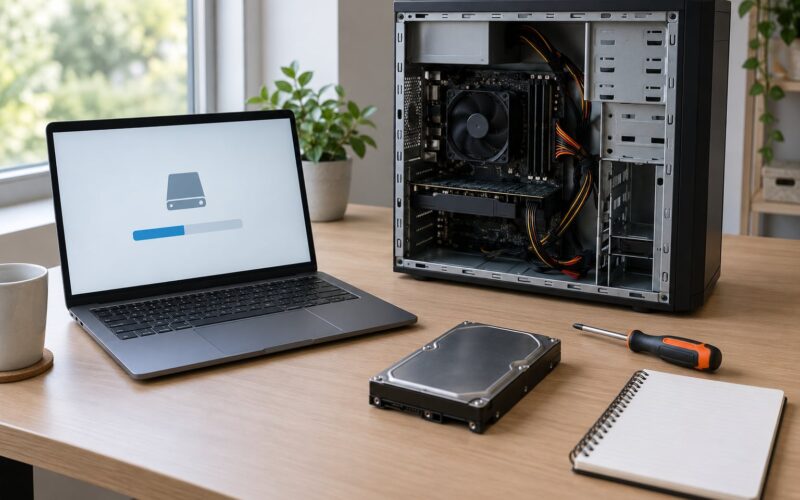
Yes, you can resize a Linux partition without losing data, and you do not have to reinstall the operating system to do it. How to resize a Linux partition without losing data comes down to a single idea: a partition has two layers, a partition-table entry that records where it starts and ends, and the filesystem living inside that boundary. Change both, in that order, and the job takes about twenty minutes. Change only the first and df -h still shows the old size, which is where most people get stuck.
There are two routes. You can grow things online from a running system with growpart, partprobe and resize2fs, which avoids a live USB entirely. Or you boot a live USB and use GParted, which is the only way to shrink, to move a boundary, or to work around a filesystem such as XFS that refuses to shrink.
I will walk through both, then the verification step that decides whether the resize actually worked. The steps below apply to a standard Linux install with a GPT partition table and an ext4, XFS or BTRFS root filesystem; I call out the LVM and dual-boot cases separately because they follow different rules.
Table of Contents
- What You Need
- Step-by-Step: How to Resize a Linux Partition Without Losing Data
- 1. Identify the partition and filesystem you are changing
- 2. Create and verify a backup
- 3. Shrink a partition and free space safely
- 4. Extend, move, or create the partition
- 5. Grow the filesystem and verify the result
- Common Mistakes
- Frequently Asked Questions
- Can I resize a Linux partition without losing data?
- Can I resize a mounted Linux root partition?
- Does resizing an ext4 or XFS partition delete its data?
- Why can GParted not shrink my Linux partition?
- Can I resize a Linux partition from Windows?
- How do I recover files if a partition resize fails?
What You Need

Before you touch anything, line these up. Skipping the first two is how people end up reinstalling.
- Root or administrator access. Every command below is prefixed with
sudo. - A verified backup of your data, on a different physical device. A backup on the same disk you are about to shrink is not a backup.
- A bootable live USB with GParted, plus a way to write it. Rufus, balenaEtcher and Ventoy all work; Ubuntu no longer ships Startup Disk Creator, so ignore older tutorials that tell you to use it.
- The current layout, written down. Run the commands in step 1 and paste the output into a text file.
- Free space to give or take, either already adjacent to the partition or reachable by moving the partition.
- An hour of clear time for a growth, considerably longer for a shrink of a large disk.
A backup of the partition table itself takes ten seconds and is the cheapest safety net available:
sudo sfdisk --dump /dev/sda > ~/part-backup.sf
lsblk -o NAME,SIZE,FSTYPE,MOUNTPOINT
That file contains every start sector, size and partition type on the disk. If a resize goes sideways, it is often the difference between a ten-minute fix and a rebuild.
Step-by-Step: How to Resize a Linux Partition Without Losing Data
1. Identify the partition and filesystem you are changing
Run these three commands before you plan anything. You are looking for the device name, the filesystem type and whether free space sits next to the partition you want to grow.
lsblk -f
df -hT
sudo parted /dev/sda print free
Typical output on a laptop with an EFI partition, root and swap:
NAME        FSTYPE LABEL  UUID                                 MOUNTPOINTS
sda
|-sda1      vfat   EFI    0A3B-7C21                          /boot/efi
|-sda2      ext4   root   6f3a1c22-9d84-4b0e-8a71-0c2f4d1e9b33 /
|-sda3      swap   swap   1c9d2a44-77b1-4f6d-9c3e-8a0b5d6e1f22 [SWAP]

Filesystem     Type  Size  Used Avail Use% Mounted on
/dev/sda2      ext4   49G   38G   9G  81% /
/dev/sda1      vfat  511M  6.1M  505M   2% /boot/efi

Model: ATA Samsung SSD 870 (scsi)
Disk /dev/sda: 120GB
Partition Table: gpt
Number  Start   End     Size    File system  Name  Flags
 1      1049kB  538MB   537MB   fat32              boot, esp
 2      538MB   52.4GB  51.9GB  ext4              root
 3      52.4GB  57.2GB  4.8GB                   swap
 4      57.2GB  64.0GB  6.8GB
Read the parted print free output carefully. The last line is unallocated space, and its position relative to your target partition decides the whole procedure. If it is directly after the partition you want to grow, you are in the easy case. If a swap partition sits between them, as it does above, you have a different problem and step 4 covers it.
Record the UUIDs as well, because device names like /dev/sda2 can change after a reboot:
sudo blkid
findmnt /home
cat /etc/fstab
On a GPT disk, parted creates a small backup partition at the end of the disk. If you see it listed, leave it alone. It holds a second copy of the partition table and removing it removes your recovery path.
2. Create and verify a backup
Copy the data that would hurt to lose, and then read some of it back. An unverified copy is a guess with a timestamp.
sudo rsync -aAXH --info=progress2 /home/ /mnt/backup-usb/home/
df -h /mnt/backup-usb
ls -lR /home | wc -l > ~/home-listing.txt
ls -lR /mnt/backup-usb/home | wc -l > ~/backup-listing.txt
diff ~/home-listing.txt ~/backup-listing.txt && echo "counts match"
If the counts differ, something did not copy. Open a few large files from the backup and confirm they are intact, not just present.
On a server, a filesystem snapshot or an image with dd serves the same purpose. Just keep in mind that an image taken of a mounted filesystem is only as good as your confidence in it, and rsync is faster and easier to verify.
3. Shrink a partition and free space safely
You can only shrink a partition after the filesystem inside it has given up the space. An ext4 filesystem keeps metadata blocks at its end, so it has to compact and relocate them before the boundary can move. That is why GParted runs a long progress bar on a shrink, and why users report a full data move taking hours on a large disk.
For ext2, ext3 and ext4, shrink the filesystem first while it is unmounted. Boot the live USB and open a terminal, or do it from a rescue environment:
sudo e2fsck -f /dev/sda2
sudo resize2fs -p /dev/sda2 30G
After that, resize2fs -p reports the new filesystem size, and only then can the partition boundary be moved to match.
Here is the constraint that catches almost everybody on Fedora, RHEL, CentOS and Arch: XFS cannot be shrunk at all. Not offline, not with GParted, not with xfsresize, which is an extended-attention-toolkit debugging tool and not a resize tool. If your root is XFS and you need it smaller, your options are reformatting, moving the data to a new filesystem, or reinstalling with the layout you want. Growing an XFS filesystem is easy; shrinking is not.
BTRFS shrinks with btrfs filesystem resize, though you cannot go below the amount of data actually stored. Swap has no filesystem to shrink, but you still turn it off before resizing:
sudo swapoff /dev/sda34. Extend, move, or create the partition
There are three separate cases. Work out which one you are in before you run anything.
Case A: free space is directly after the partition. This is the online path, and the partition does not need to be unmounted:
sudo growpart /dev/sda 2
sudo partprobe /dev/sda
df -h /
growpart is the resize wrapper for the partition table entry, and partprobe makes the kernel re-read the table. You will usually see a warning that the kernel cannot re-read a partition table while it has mounted partitions in use. That warning is expected on a root partition and harmless here, because the new size is already written to disk and takes effect after a reboot or after the filesystem grow in step 5.
Case B: free space is on the far side of another partition. This is the case that generates half the panicked forum threads about resizing. The order is not optional:
- Shrink the neighbour that sits between your target and the free space, filesystem first, then boundary.
- Move the target partition toward the start of the disk so its beginning sits next to the freed space. In GParted, right-click, choose Resize/Move, and drag the left edge to consume the unallocated block.
- Extend the target partition to consume the space that is now on its right.
sudo e2fsck -f /dev/sda3
sudo resize2fs -p /dev/sda3 2G
# then shrink /dev/sda3 to 2G with parted or fdisk
# then move /dev/sda2, then extend it into the new free space
If swap sits in the middle, delete it first, do the move and extend, then recreate swap at the end of the disk and update /etc/fstab with the new UUID. Leaving swap where it is simply means no contiguous space is available.
Case C: the partition is an LVM logical volume. With LVM, the partition table is only the bottom layer, and the resize happens at three levels: physical volume, volume group, logical volume. The filesystem is not part of the lvextend step unless you pass -r:
sudo pvresize /dev/sdb1
sudo lvextend -r -L +50G /dev/ubuntu-vg/ubuntu-lv
The -r flag tells lvextend to grow the filesystem too. Without it, the logical volume is larger and the filesystem is not, which is the same two-layer problem as before. For XFS on a logical volume, run sudo xfs_growfs / afterwards instead.
Resizing from inside Windows. Windows Disk Management can shrink an NTFS volume and, in current versions, extend one, but it cannot see or touch ext4, XFS or BTRFS partitions as anything other than unallocated space. To shrink Linux for Windows, boot the live USB, shrink the Linux filesystem and partition, then create an NTFS partition in Windows. Users on Linux forums are distrustful of third-party Windows partition managers, and their instinct is reasonable.
5. Grow the filesystem and verify the result
This is the step people skip, and it is why they finish a resize and see the old number in df -h. The partition table entry changed; the filesystem did not. Pick the command that matches your type:
sudo resize2fs /dev/sda2          # ext2, ext3, ext4
sudo xfs_growfs /                 # XFS, mounted root
sudo btrfs filesystem resize max /
xfs_growfs takes a mount point, not a device, and it only ever grows. btrfs filesystem resize max is the equivalent one-liner for BTRFS.
Now confirm it worked rather than assuming:
df -hT /
lsblk -o NAME,SIZE,FSTYPE,MOUNTPOINT
sudo parted /dev/sda print free
Filesystem Type Size Used Avail Use% Mounted on
/dev/sda2 ext4 99G 38G 53G 40% /If lsblk shows the new partition size but df -hT still shows the old one, the filesystem simply has not been grown. Run the matching command again. resize2fs -p /dev/sda2 is safe to re-run and fixes a mismatch between a partition entry and its filesystem.
One more check when the boot partition moved or you rebuilt the layout from scratch: reinstall the bootloader while booted from the live USB, chrooted into your install.
sudo grub-install --target=x86_64-efi --efi-directory=/boot/efi --bootloader-id=ubuntu
sudo update-grub
Common Mistakes
Nearly every failed resize I have seen traces back to one of these.
- Resizing a mounted root partition with a GUI tool. GParted will refuse, and it is right to. Boot the live USB for anything that needs a shrink or a move.
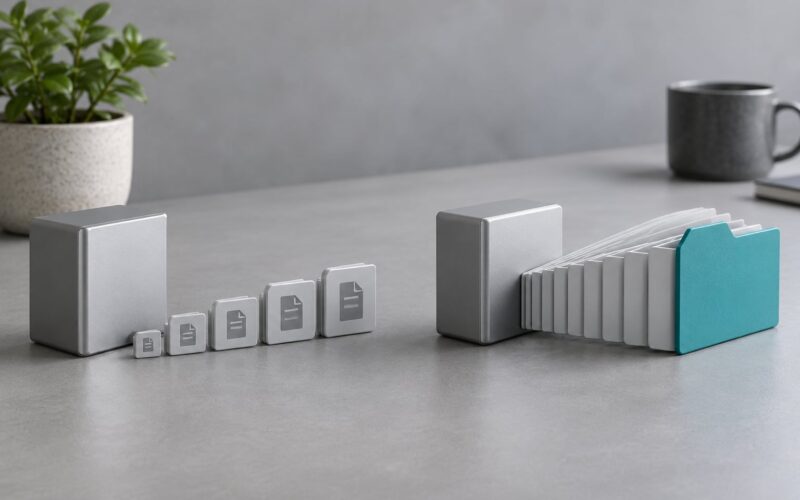
- Confusing free space with unallocated space. Free space is inside the partition and is not usable by another partition. Unallocated space is outside every partition and can only be absorbed by a neighbouring partition or a move. You shrink the filesystem to create the first kind, then change boundaries to use the second.
- Skipping the backup. A partition resize is one of the few operations where a mistake destroys everything on the device at once. The backup takes minutes.
- Using the wrong partition number or device name. Device names shift between
/dev/sdaand/dev/nvme0n1depending on firmware and enumeration. Always confirm withlsblk -fimmediately before you commit, and re-check after a reboot before running the filesystem grow. - Deleting a partition to recreate it larger. This works in exactly one situation: the free space is directly after the partition and you recreate it with the identical start sector. Anywhere else it destroys the filesystem.
growpartandfdisk‘s resize option do the same thing without the risk. - Interrupting a shrink. A move in progress leaves a filesystem that was being rewritten. Do not power off. If it already happened, run
sudo e2fsck -f /dev/sda2on the unmounted filesystem and hope for the best, then restore from your backup if the check reports errors you cannot clear. - Expecting GParted to shrink XFS. It cannot, and no other tool can either. Grow it freely; plan a new filesystem if you need it smaller.
- Not backing up the partition table. Ten seconds with
sfdisk --dumpbefore you start, andsudo sfdisk /dev/sda < ~/part-backup.sfif the table itself gets clobbered. - Forgetting the filesystem step. Resizing the partition and stopping leaves the old size showing forever. This is the single most common outcome of a resize that people think failed.
Frequently Asked Questions
Can I resize a Linux partition without losing data?
Yes, in the overwhelming majority of cases. Growing an ext4, XFS or BTRFS filesystem preserves all data, and so does shrinking, as long as the filesystem has enough free space to give up and you keep a verified backup. Data is lost when a resize is interrupted, when boundaries are changed without shrinking the filesystem first, or when a partition is deleted and recreated with the wrong start sector.
Can I resize a mounted Linux root partition?
You can grow the partition entry and the filesystem while root is mounted, using growpart followed by resize2fs for ext4 or xfs_growfs / for XFS. The kernel may warn that it cannot re-read the partition table while partitions are mounted; that is expected. You cannot shrink or move a mounted root partition, and a swap partition can only be turned off first.
Does resizing an ext4 or XFS partition delete its data?
No. Both are resized in place, and the filesystem writes its metadata to the new space. The one real difference is direction: ext4 can be grown and shrunk, while XFS can only ever be grown. There is no supported way to shrink an XFS filesystem, so if you need one smaller you have to move the data to a new filesystem. BTRFS grows and shrinks within the data actually stored.
Why can GParted not shrink my Linux partition?
Three causes cover almost every case. The filesystem is mounted and in use, which GParted reports as busy or in use. The filesystem has too little free space inside it to release. Or the filesystem type cannot shrink at all, which is true of XFS. Check with df -h to see free space, confirm the filesystem type with lsblk -f, and boot the live USB so nothing is mounted.
Can I resize a Linux partition from Windows?
Only partly. Windows Disk Management can shrink NTFS and extend volumes, but it treats ext4, XFS and BTRFS as unallocated space it cannot interpret. To shrink Linux for a dual boot, boot a live USB, shrink the Linux filesystem and partition, then create the NTFS partition from Windows. To grow Linux into space freed by a deleted Windows partition, use the live USB and GParted.
How do I recover files if a partition resize fails?
Stop writing to the disk immediately and do not run repair tools yet. If the partition table is intact, the data is usually still there and TestDisk or PhotoRec can rebuild the filesystem or carve files from the raw device. If the table itself is damaged, restore it from your sfdisk u002du002ddump backup. If the filesystem was mid-shrink when power was lost, try e2fsck on the unmounted partition before restoring from your data backup.
If you do one thing before anything else, run sudo sfdisk --dump /dev/sda > ~/part-backup.sf and copy your data off the disk. After that, check the filesystem type with lsblk -f: ext4 lets you grow online with growpart and resize2fs in about five minutes, XFS grows but never shrinks, and anything requiring a shrink or a move happens from the live USB with GParted. Finish every time with the filesystem grow step, then confirm the new size in df -hT before you close the laptop.