
To set a static IP on Linux, you write the address, subnet prefix, gateway and DNS servers into your distribution’s network configuration file, apply it, and then verify the result. On Ubuntu and Debian that file is a Netplan YAML file in /etc/netplan; on RHEL, Fedora and most desktops it is a NetworkManager profile you edit with nmcli.
The whole job takes about five minutes on a machine you can reach at the console. Over SSH on a headless server it is riskier, because applying the config re-renders the interface and can drop your session in under a second.
Last updated: October 2026
Before the commands, one distinction worth getting right. A static IP is written into the host and survives reboots. A DHCP reservation lets the router hand out the same address forever from a pool. Both give you a fixed address; only the first hands you the work of managing it. If you are on a home network and nothing else needs the host-level control, the reservation is the calmer option.
Table of Contents
- What You Need
- Step-by-Step: How to Set a Static IP on Linux
- How to Set a Static IP on Linux with Netplan
- How to Set a Static IP on Linux with NetworkManager
- Verify the Address, Route, and Internet Connection
- Confirm the Change Survives a Reboot
- Common Mistakes
- Frequently Asked Questions
- What is the difference between a static IP and a reserved DHCP address on Linux?
- Can I set a static IP address for a Linux Wi-Fi connection?
- Why did my static Linux IP address disappear after a reboot?
- Do I need a default gateway for a static IP address on Linux?
- How do I change a static Linux IP address back to DHCP?
- Conclusion
What You Need
You need five values and a way back in before you touch anything.
- Root or sudo access on the machine. Every configuration file in this guide lives under
/etc. - The interface name, for example
enp0s3,ens18,eth0orwlo1. - The address and prefix you want, in CIDR notation such as
192.168.1.50/24. The/24is the netmask; leaving it off is one of the most common failures. - The default gateway and at least one DNS server. The gateway is usually the router, something like
192.168.1.1. - Recovery: a physical console, IPMI, or a second SSH session sitting open while you work. If you are editing the only interface that carries your connection, keep one of those open.
Run these two commands first. The first finds the interface and its current address, the second shows the gateway the machine is currently using.
ip -br addr
ip route
lo     UNKNOWN  127.0.0.1/8 ::1/128
enp0s3 UP       192.168.1.42/24 fe80::a00:27ff:fe4e:1a2c/64

default via 192.168.1.1 dev enp0s3 proto dhcp metric 100
Note the interface name in the left column and the via address in the route table. Those two values feed everything below.
Next, find out which tool owns your network configuration. Each distribution ships one manager, and writing a config file for a manager that is not running is why so many tutorials appear to do nothing.
| Distribution or system | Network manager | Config file | Apply command |
|---|---|---|---|
| Ubuntu Server 18.04 and newer | Netplan (renders to networkd or NetworkManager) | /etc/netplan/*.yaml | netplan apply |
| Ubuntu Desktop, Debian 12 with NetworkManager | NetworkManager | Keyfiles under /etc/NetworkManager/system-connections | nmcli connection up |
| RHEL, Rocky, Alma, Fedora, CentOS Stream | NetworkManager | Keyfiles under /etc/NetworkManager/system-connections | nmcli connection up |
| Debian legacy, Kali, Raspberry Pi OS | ifupdown | /etc/network/interfaces | systemctl restart networking |
| Arch, NixOS, minimal Debian installs | systemd-networkd | /etc/systemd/network/*.network | networkctl reload && networkctl renew enp0s3 |
| RHEL 8 and older only | Legacy network-scripts | /etc/sysconfig/network-scripts/ifcfg-* | ifdown ens && ifup ens |
ifconfig is worth a separate mention because you will still see it in older guides. It belongs to the net-tools package and has not been maintained for years. It also cannot make an address persistent. Everything below uses ip from iproute2, which is preinstalled on every current distro.
Step-by-Step: How to Set a Static IP on Linux
Back up the file you are about to change, write one configuration, apply it, and check the result. Skipping the backup is the reason a five-minute task turns into an evening.
How to Set a Static IP on Linux with Netplan
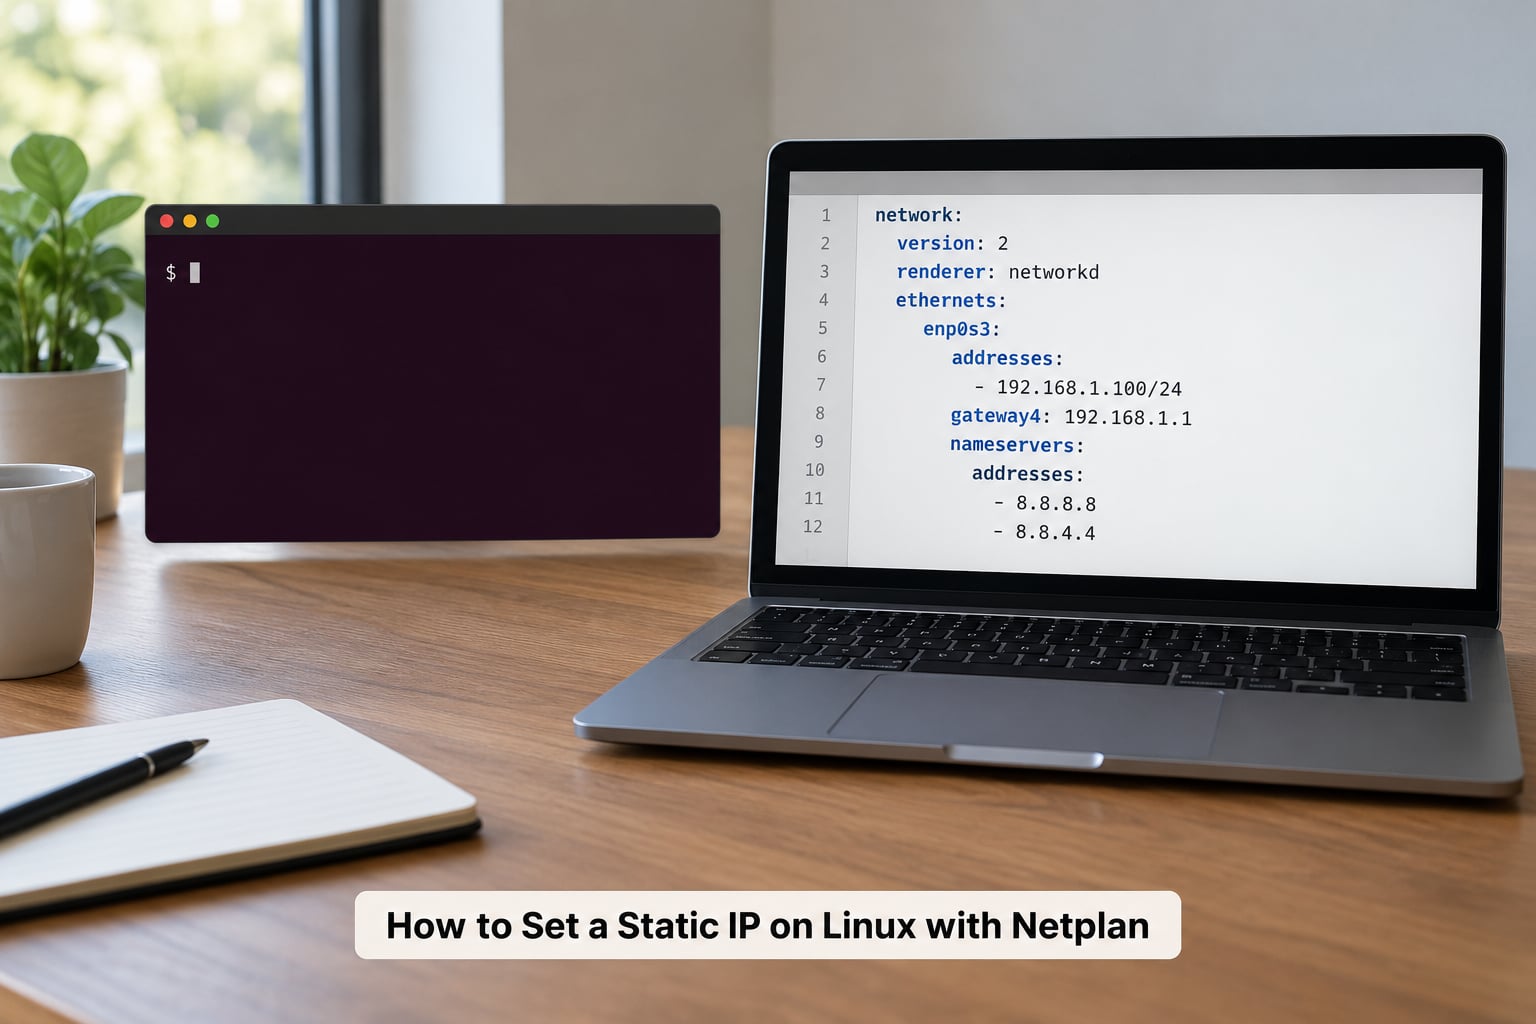
Netplan is the default on Ubuntu Server 18.04 through the current releases, so this is the section most readers want.
- Look at the existing file. Ubuntu usually ships one at
/etc/netplan/01-netcfg.yaml. Some upgrades leave several files, and Netplan merges them in alphabetical order, so an old file can override a new one. - Back it up.
ls -l /etc/netplan/
sudo cp /etc/netplan/01-netcfg.yaml /etc/netplan/01-netcfg.yaml.bak
- Replace the file with a static configuration. Use
sudo nano /etc/netplan/01-netcfg.yamland paste this, changing the address to match your own subnet:
network:
  version: 2
  renderer: networkd
  ethernets:
    enp0s3:
      addresses:
        - 192.168.1.50/24
      routes:
        - to: default
          via: 192.168.1.1
      nameservers:
        addresses:
          - 1.1.1.1
          - 8.8.8.8
YAML is whitespace-driven, and that is the single biggest reason netplan apply fails. Every key needs a space after the colon, nested keys must be indented further than their parent, and the list items under addresses and nameservers need the dash and then a single space. Two spaces per level is the usual convention.
Set the renderer to networkd if systemd-networkd handles your links, which is the Ubuntu Server default. Use NetworkManager instead on a desktop; pick one, not both. Running both managers over the same interface produces two addresses on one NIC and is a frequent source of confusion.
gateway4: 192.168.1.1 still works on older Netplan releases. In Netplan 1.x the routes: block shown above is the current syntax and the old key is deprecated.
- Tighten the file permissions. Netplan refuses to read world-readable files because they can hold Wi-Fi passwords. Newer releases warn and continue; older ones abort.
sudo chmod 600 /etc/netplan/01-netcfg.yaml
- Check the YAML before touching the network. This parses the file and writes the generated config without applying anything, so a syntax error shows up here rather than mid-change.
sudo netplan generate
- Try it safely. On any machine you reach over SSH, run
netplan tryrather thannetplan apply. It applies the config, waits about 120 seconds for you to press Enter, and rolls back to the previous configuration if you go quiet. On a local console,netplan applyis fine.
sudo netplan try
# confirm the new address works, then press Enter within the countdown
Do not treat the countdown as the finished job. It protects you during the experiment, not after the next reboot.
- Commit it. Once verification below passes, apply for real so the setting survives a reboot.
sudo netplan apply
If you ever want the old behaviour back, the backup is a plain file copy: sudo cp /etc/netplan/01-netcfg.yaml.bak /etc/netplan/01-netcfg.yaml && sudo netplan apply.
How to Set a Static IP on Linux with NetworkManager
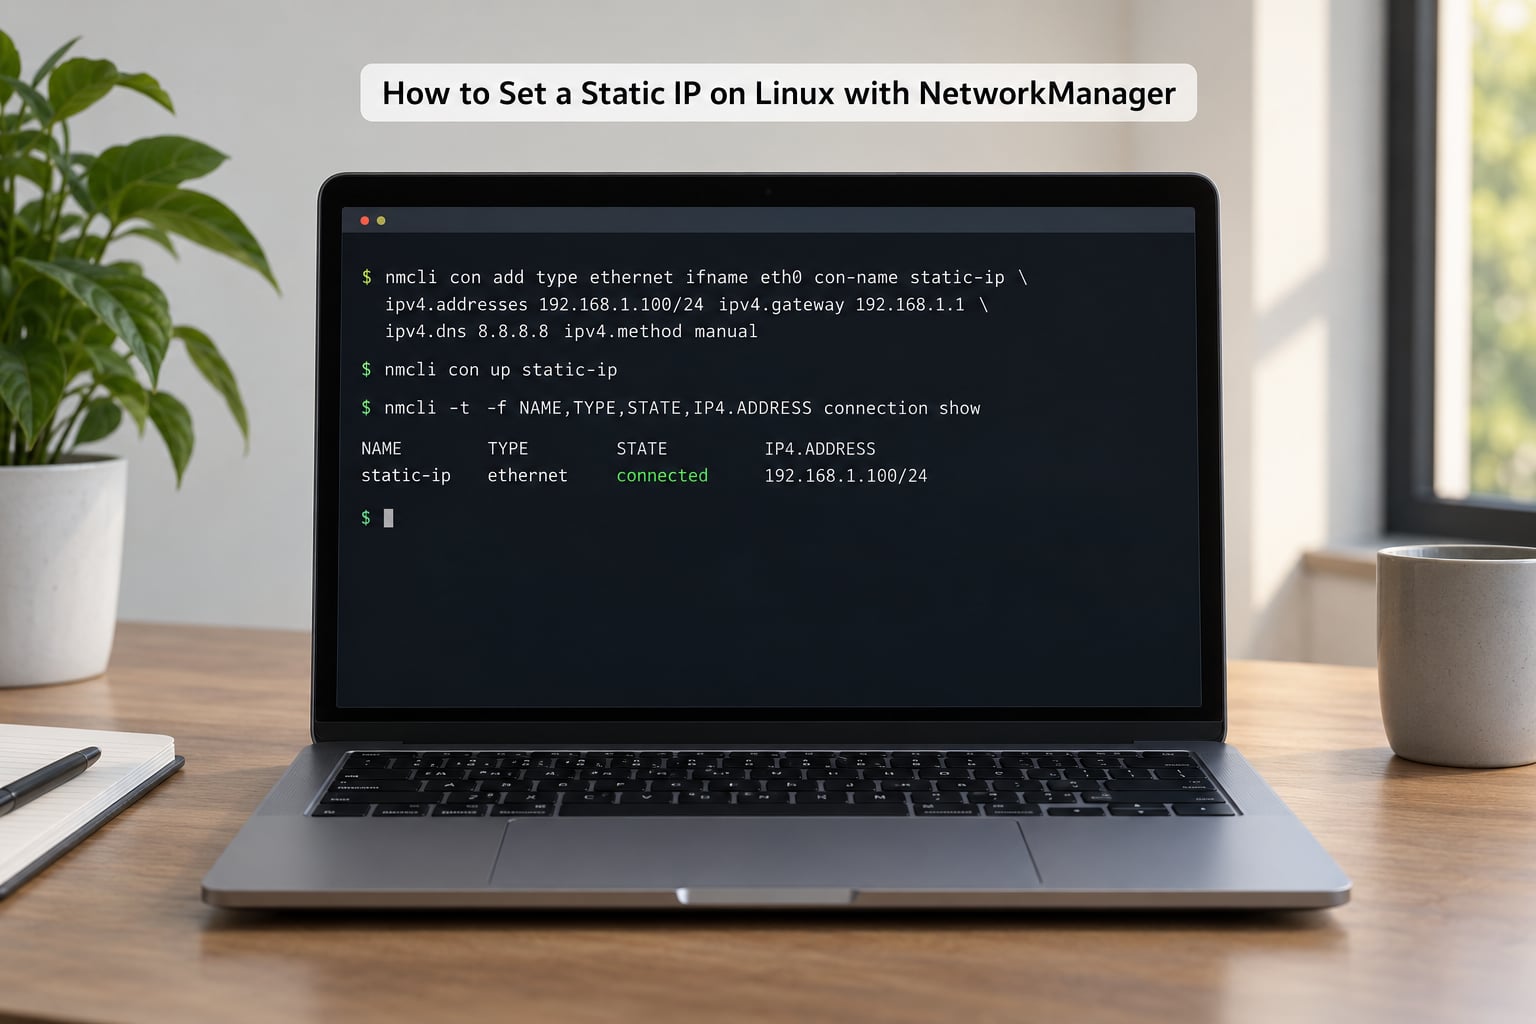
Use nmcli on RHEL, Rocky, Fedora, CentOS Stream and Ubuntu Desktop. It edits the same connection profile NetworkManager already uses, so the change persists without touching a config file by hand.
List the profiles and the devices first. Profiles and devices often have different names, and using the wrong one is the most common nmcli mistake.
nmcli connection show
nmcli device status
NAME                DEVICE      TYPE      STATE      CONNECTION
Wired connection 1  enp0s3      ethernet  connected  Wired connection 1
lo                  lo          loopback  unmanaged  --
The DEVICE column gives you the interface. The CONNECTION column gives you the profile name you pass to nmcli.
To turn an existing profile into a static one, modify it in one command:
nmcli connection modify "Wired connection 1"
  ipv4.method manual
  ipv4.addresses 192.168.1.50/24
  ipv4.gateway 192.168.1.1
  ipv4.dns "1.1.1.1,8.8.8.8"
  ipv4.never-default no
To leave the old DHCP profile intact and add a separate static one, create it instead:
nmcli connection add type ethernet
  ifname enp0s3 con-name static-enp0s3
  ipv4.method manual
  ipv4.addresses 192.168.1.50/24
  ipv4.gateway 192.168.1.1
  ipv4.dns "1.1.1.1,8.8.8.8"
Two switches carry most of the weight here. ipv4.method manual is what stops NetworkManager asking DHCP for a lease; without it the rest is ignored. The /24 after the address is the prefix length and must be there.
Bring the connection up and confirm it took:
nmcli connection up "Wired connection 1"
nmcli device status
Re-running nmcli device status is enough. If the connection failed, nmcli -f NAME,DEVICE,STATE connection show --active plus journalctl -u NetworkManager -n 40 will usually name the reason.
Wi-Fi profiles take the same shape. Find the SSID profile, then set the four values on it:
nmcli connection modify "MyNetwork"
  ipv4.method manual
  ipv4.addresses 192.168.1.60/24
  ipv4.gateway 192.168.1.1
  ipv4.dns "1.1.1.1,8.8.8.8"
nmcli connection up "MyNetwork"
Verify the Address, Route, and Internet Connection
Verify in four stages, because each one can pass while the next fails. A successful ping to a website does not prove your DNS is working, and a working address does not prove you have a route out.
- Address applied?
ip -br addr show enp0s3
enp0s3 UP 192.168.1.50/24 fe80::a00:27ff:fe4e:1a2c/64
If the old DHCP address is still there too, two managers are writing to the interface. Check which one owns it with networkctl status enp0s3 and turn the other off.
- Default route present?
ip route
default via 192.168.1.1 dev enp0s3 proto static
An empty table or no default line is why an otherwise correct configuration has no internet. The address and the gateway must sit in the same subnet; a gateway of 192.168.0.1 on a 192.168.1.0/24 network is unreachable by definition.
- Local then external reachability.
ping -c 3 192.168.1.1
ping -c 3 1.1.1.1
The gateway answers first. If it does, your address, mask and cable are fine and the problem is upstream. If the gateway answers but 1.1.1.1 does not, routing or an upstream block is the cause.
- Name resolution.
getent hosts ubuntu.com
resolvectl status
curl -I https://example.com
An empty result from getent hosts is a DNS problem, not a routing one. This is where editing /etc/resolv.conf directly tends to go wrong: on any system running systemd-resolved, that file is a symlink and your nameservers are overwritten at every boot.
Put the nameservers in the network configuration instead, which is what the nameservers block above does. On systemd-resolved, resolvectl dns enp0s3 1.1.1.1 8.8.8.8 sets them for the current boot, and a drop-in under /etc/systemd/resolved.conf.d/ makes them stick.
For reference, these are the ip equivalents of the old ifconfig commands, since most guides online still mix the two:
| Task | Modern (iproute2) | Legacy (net-tools) |
|---|---|---|
| Show all addresses | ip -br addr | ifconfig -a |
| Show one interface | ip addr show enp0s3 | ifconfig enp0s3 |
| Add an address | ip addr add 192.168.1.50/24 dev enp0s3 | ifconfig enp0s3 192.168.1.50 netmask 255.255.255.0 |
| Remove an address | ip addr del 192.168.1.50/24 dev enp0s3 | ifconfig enp0s3 0.0.0.0 |
| Show routing table | ip route | route -n |
| Add a default route | ip route add default via 192.168.1.1 | route add default gw 192.168.1.1 |
| Show link state | ip link show enp0s3 | ifconfig enp0s3 |
| Set the interface up | ip link set enp0s3 up | ifconfig enp0s3 up |
None of those persist an address. If you only ever run ip addr add, the address disappears at reboot and at every network restart, which is the usual explanation for an address that vanished overnight.
Confirm the Change Survives a Reboot
Confirm a static address by rebooting the machine and checking that the address is still there. Everything before that only proves the configuration was accepted once.
On a local console, sudo systemctl reboot is enough. On a remote host, schedule it so you have a window to abort: sudo shutdown -r +5 "netplan change test" runs the reboot in five minutes, and sudo shutdown -c cancels it. Schedule it only after the address and route have checked out over the connection you are using.
After it comes back, run two commands:
ip -br addr show enp0s3
ip route
Then connect from another device on the same network and confirm the machine answers at its new address, for example ping 192.168.1.50. Confirming from a second machine catches a class of problem that localhost checks cannot: a firewall rule still bound to the old address.
One rule matters more than the rest. The address must be outside the pool your router hands out, or reserved in the router for that MAC address. Pick 192.168.1.50 when the DHCP range is 192.168.1.100 to 192.168.1.200. Choose a number the pool covers and the router will eventually hand it to a different machine, which produces intermittent failures that look like network problems for weeks.
Common Mistakes
Almost every static IP failure falls into one of the patterns below. Work down the list in order, because the earlier entries explain more cases than the later ones.
The address applied but there is no internet. Nearly always one of three things: a wrong gateway, a missing or wrong DNS server, or a missing prefix on the address. Check ip route for the default line, then getent hosts example.com for DNS. Wrong gateway and wrong mask both show up as an address that looks correct while packets go nowhere.
Wrong interface name. You wrote eth0 in a file for a machine whose NIC is enp0s3, or ens18 on a laptop with wlo1. Predictable interface names are derived from the PCI path or the board, so they change when you move a disk, add a NIC, or clone a VM. Hardcoding one is fine on a fixed box and a liability on a laptop. When the name is uncertain, match on macaddress in Netplan or use a match block keyed on the driver instead.
Two managers fighting over one interface. Netplan rendering to NetworkManager while NetworkManager is also configured by hand, or systemd-networkd running alongside NetworkManager, gives you two addresses on one NIC. Pick one manager and disable the other rather than trying to order them.
Netplan YAML indentation. A single space where a list item expects two, or a tab character, makes netplan apply fail or quietly do nothing. Run sudo netplan generate before applying; it reports the parse error without touching the network.
Missing subnet prefix. addresses: 192.168.1.50 without /24 leaves the mask unset and the host effectively unreachable from other machines.
Editing /etc/resolv.conf and watching DNS vanish. systemd-resolved regenerates that file on every boot. Set nameservers in the network configuration, or in a resolved drop-in, instead.
Applying over SSH with no recovery path. netplan apply and systemctl restart NetworkManager both bounce the interface. Keep a second session open or use netplan try, which reverts by itself after its countdown.
The address is already leased to someone else. A clash with DHCP looks like random breakage under load. Reserve the address in the router, or pick one outside the pool.
A Wi-Fi profile that never reconnects. Manual addressing on a wireless profile without the saved connection still enabled means the machine does not come back after a reboot or a link drop. Check that the profile has connection.autoconnect set to yes and a saved PSK, and be aware that a wireless static address is tied to one network, so it will not roam usefully between home and office.
Reverting takes about the same time as setting up. With Netplan, restore DHCP by editing the file back to dhcp4: true under the interface and running sudo netplan apply, or copy the backup over it. With NetworkManager:
nmcli connection modify "Wired connection 1" ipv4.method auto ipv4.addresses "" ipv4.gateway "" ipv4.dns ""
nmcli connection up "Wired connection 1"
On ifupdown systems, change iface enp0s3 inet static back to iface enp0s3 inet dhcp, remove the address, gateway and dns-nameservers lines, then run sudo systemctl restart networking.
Before any of that, record what DHCP was handing out, so you can return to the same address later: ip -br addr while the lease is still active, or journalctl -u NetworkManager | grep DHCPACK.
Frequently Asked Questions
What is the difference between a static IP and a reserved DHCP address on Linux?
Both give you an address that never changes. A static address is configured on the Linux host itself, in Netplan, NetworkManager or an interfaces file, and the host manages its own gateway and DNS. A reserved address is a DHCP lease your router always gives to that MAC address. Reservations are easier to change and cannot conflict with the pool, while host-side static addresses give you full control but are your problem to keep correct.
Can I set a static IP address for a Linux Wi-Fi connection?
Yes. With NetworkManager, set ipv4.method manual, ipv4.addresses, ipv4.gateway and ipv4.dns on the Wi-Fi profile by name, then bring it up with nmcli connection up. In Netplan, configure the wireless interface under the wlan section with the same fields used for a wired interface. Keep autoconnect enabled, or the profile will not return after a reboot. A fixed address only makes sense on one network.
Why did my static Linux IP address disappear after a reboot?
Almost always because the change was never persistent. The ip command only changes the running configuration, and it is discarded at every restart. Check whether you wrote the address into a Netplan YAML file, a NetworkManager keyfile or an interfaces file, and confirm you applied it with netplan apply or nmcli connection up. A second cause is a second file or profile that takes precedence at boot.
Do I need a default gateway for a static IP address on Linux?
You need one to reach anything outside your own subnet, which includes DNS servers, package mirrors and anything you administer remotely. A single-NIC host with no upstream network can omit it. When the gateway is set, it must sit inside the interface’s own subnet, otherwise the host cannot reach it and routing silently fails.
How do I change a static Linux IP address back to DHCP?
With Netplan, set dhcp4 to true under the interface, remove the static address, route and nameserver blocks, then run netplan apply. With NetworkManager, run nmcli connection modify on the profile name with ipv4.method auto and empty address, gateway and dns fields, then bring the connection up. On ifupdown systems, replace the inet static line with inet dhcp and restart networking.
Conclusion
Start by identifying the interface and the manager that owns it, then write one persistent configuration and verify it in four stages: address, default route, gateway and external ping, then DNS.
On Ubuntu that means a file in /etc/netplan applied with netplan try or netplan apply; elsewhere it usually means an nmcli profile. Back up the file first, keep a second session open if you are remote, and choose an address outside the DHCP pool. The first command is always ip -br addr.