If you want to know how to check hard drive health on Windows, start with the file system, then read the drive’s S.M.A.R.T. self-monitoring data, and finish by deciding whether to back up and replace. None of the steps take more than a few minutes except the optional surface scan, and none of them need third-party software until you want the detailed hardware attributes. This guide works on Windows 10 and Windows 11 and covers SSDs as well as mechanical hard drives.
Drives rarely die all at once. They start reallocating sectors, then the operating system starts logging disk errors, and only then does the machine refuse to boot. Checking early gives you a window to copy your files off before the drive goes quiet.
Updated for 2026. Paths differ slightly between Windows 10 and Windows 11, and those differences are called out where they matter.
Table of Contents
- What You Need
- Step-by-Step
- 1. Confirm the Drive and File System
- 2. Check Disk Management for File-System Errors
- 3. Read S.M.A.R.T. Health Status
- S.M.A.R.T. attributes worth watching
- 4. Run a Surface Scan and Inspect Bad Sectors
- 5. Check Free Space, Events, and Performance Signs
- CHKDSK switches and exit codes at a glance
- Common Mistakes
- Frequently Asked Questions
- What is the best way to check hard drive health on Windows?
- Does Windows Check Disk check the physical hard drive?
- What does a S.M.A.R.T. Caution or Failure status mean?
- Can I check hard drive health on an SSD in Windows?
- What should I do if my hard drive reports bad sectors?
- How can I tell whether a Windows disk problem is hardware or software?
- Conclusion
What You Need
Most of this guide runs on tools already on your machine. You will need administrator rights for the file system and S.M.A.R.T. checks, because Windows deliberately hides raw disk access from standard accounts.
- Administrator access — right-click Start, choose Terminal (Admin) or Command Prompt (Admin). Without it, CHKDSK and the storage cmdlets will refuse to run.
- Disk Management — press Windows key, type diskmgmt.msc, hit Enter. This shows every disk Windows can see, including ones with no drive letter.
- Command Prompt or PowerShell — either works. PowerShell gives you cleaner output for the reliability counters.
- A S.M.A.R.T. reader — optional, but this is the only way to see individual attributes. CrystalDiskInfo is the one most people land on.
- Free space on the drive — a nearly full SSD slows down and a nearly full HDD fragments badly. Both look like a “health” problem when they are not one.
- Your files backed up somewhere else — this is the real requirement. Every check below is labelled read-only or writing to disk.
On a second-hand drive, add a vendor tool for the make. Seagate SeaTools and Samsung Magician both run free extended tests and are the authoritative answer for their own hardware.
Step-by-Step
1. Confirm the Drive and File System
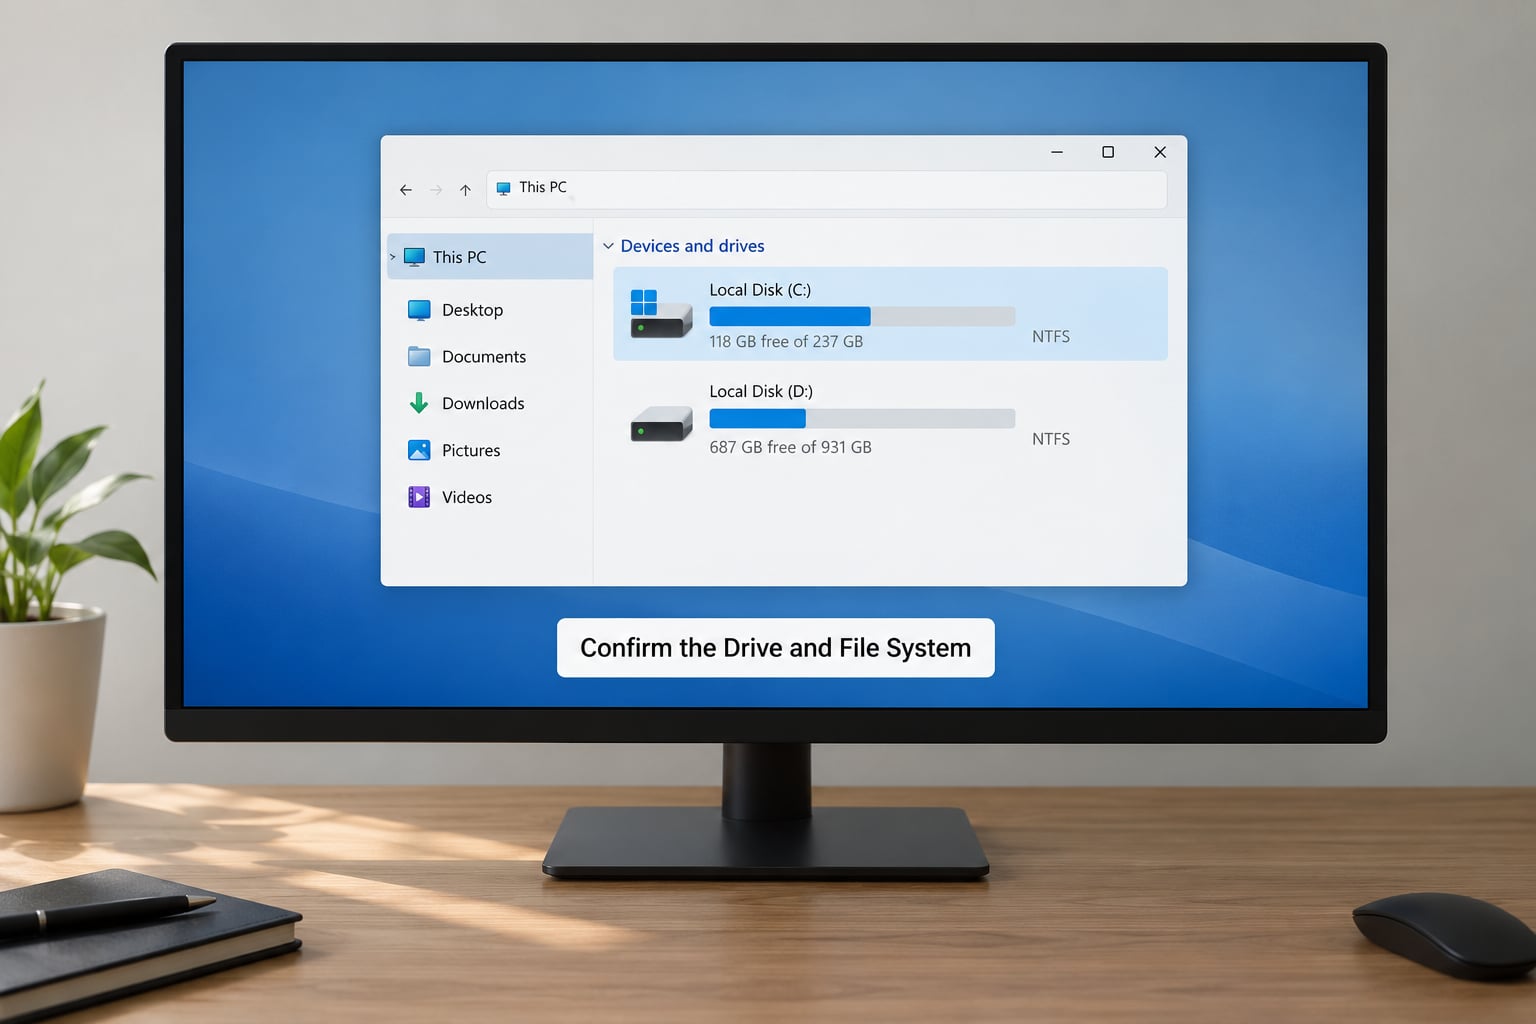
Before testing anything, make sure you know which physical drive you are pointing at. Windows has two separate naming systems here, and mixing them up is the most common reason people conclude the wrong drive is faulty.
The drive letter is C:, D:, E: — the shortcut you see in File Explorer. The disk number is Disk 0, Disk 1, Disk 2 — what PowerShell and Disk Management call the physical device. One disk can have several partitions, each with its own drive letter. Skipping this mapping step is the single biggest reason people run a check on the wrong disk when they set out to check hard drive health on Windows.
Open File Explorer, click This PC, and note the letters and sizes you see. Then open Disk Management and match them up. Disk Management is also where you spot problems no health tool reports: a disk that shows as Not initialized in black text, a partition marked Unallocated, or a volume with a yellow bar that Windows has flagged.
Here is the honest limit of what these tools tell you: every check on this list reads data the drive and Windows have already stored. None of them can prove a drive is healthy, because a drive with a failing read head still reports fine until it is asked for the sector that head cannot reach.
2. Check Disk Management for File-System Errors
File-system errors and physical hardware failure are different problems, and Windows has a specific tool for the first one. Run a read-only online scan from an elevated terminal:
chkdsk C: /scanThe /scan switch works on a volume that is in use, which is why it is the safe first pass. NTFS volumes also carry a dirty bit — a flag Windows sets after an unclean shutdown and clears once the file system is consistent again. You can read it directly:
fsutil dirty query C:If that reports “is Dirty”, the volume was not closed cleanly and CHKDSK should run before anything else.
What CHKDSK repairs: lost allocation units, orphaned files, mismatched file timestamps and index inconsistencies. What it cannot repair: scratches, dead platters, failed heads. If the disk makes clicking or grinding sounds, run the backup first and skip the repair entirely.
3. Read S.M.A.R.T. Health Status
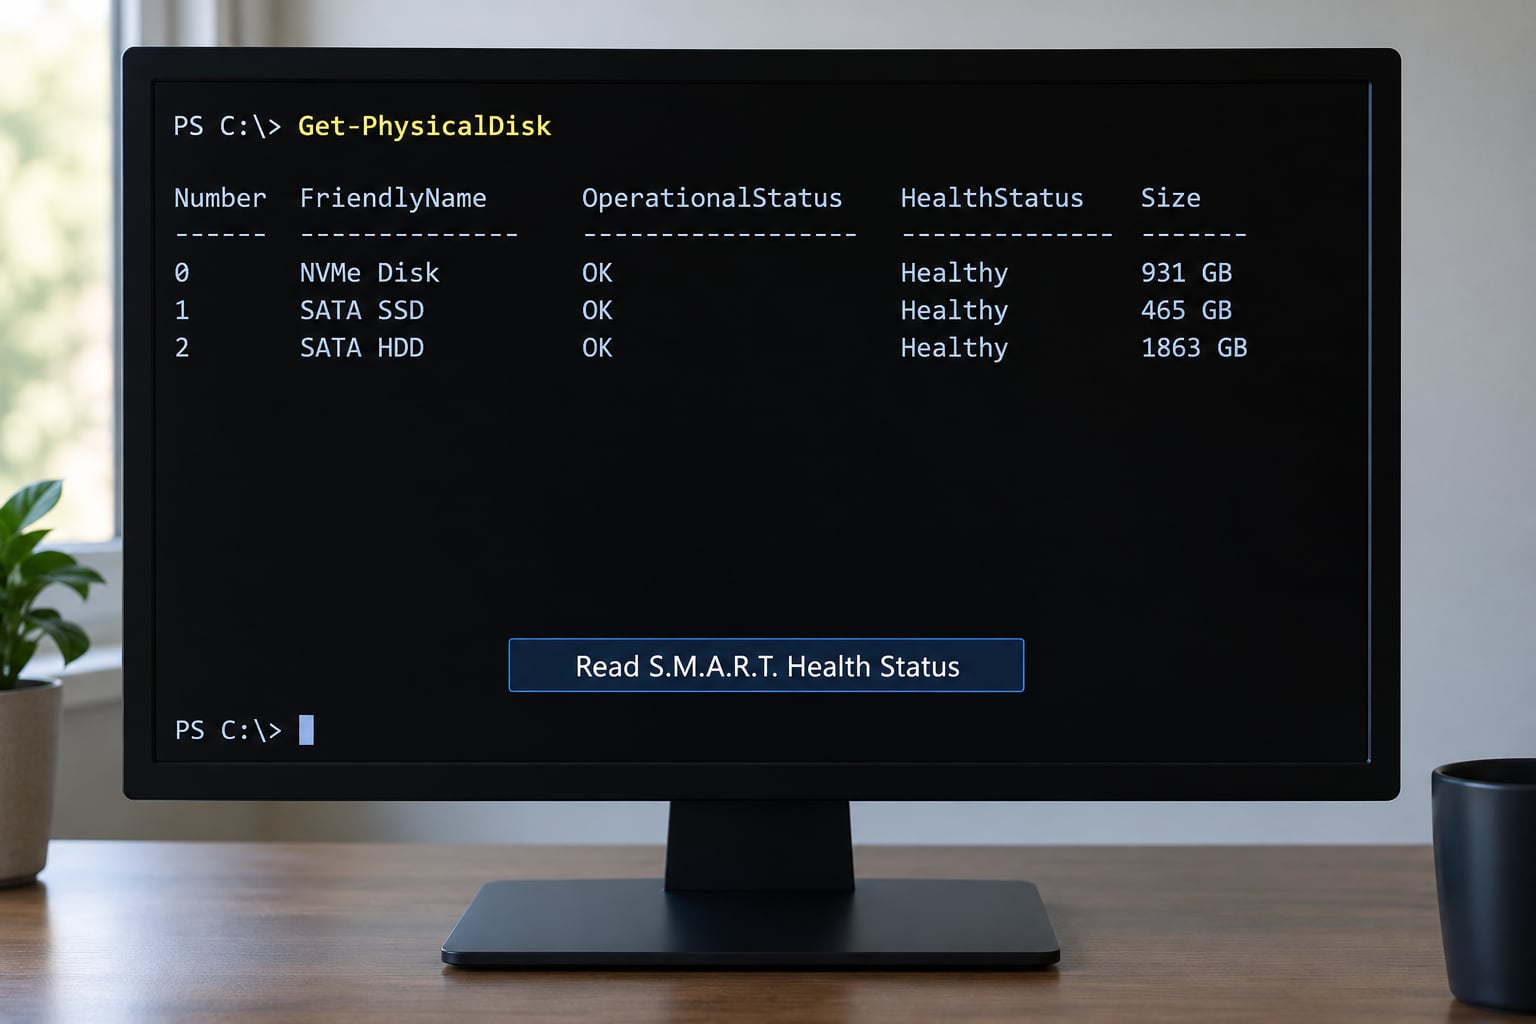
S.M.A.R.T. stands for Self-Monitoring, Analysis and Reporting Technology. Your drive has been tracking its own condition for years, and Windows can read that log. The classic command is:
wmic diskdrive get model,statusYou will see this quoted constantly, and it is worth knowing why it disappoints people. WMIC is deprecated and removed from current Windows builds, and even where it still runs, the status column returns OK for drives that are already losing sectors. Treat it as a smoke alarm, not a diagnosis.
PowerShell does the job properly. Run it from Terminal (Admin):
Get-PhysicalDisk | Format-Table FriendlyName, MediaType, HealthStatus, OperationalStatusGet-PhysicalDisk | Get-StorageReliabilityCounter | Format-List *The second command is the useful one. It returns temperature, power-on hours, read and write errors, and wear for SSDs. Some counters come back empty on older SATA drives — that is normal, not a fault.
Windows only gives you a summary through those cmdlets. To check hard drive health on Windows at the attribute level, you need a S.M.A.R.T. reader, and CrystalDiskInfo is the one most people install. Download it from the CrystalDiskInfo site only, run it, and look at the health status in the top left. The status ladder runs from good to bad:
| S.M.A.R.T. status | What it means | What to do |
|---|---|---|
| Good / OK | No attribute has crossed its failure threshold | Keep it in your rotation, re-check every few months |
| Caution | An attribute crossed its pre-failure threshold | Back up now and buy a replacement |
| Bad | At least one attribute hit its failure threshold | Treat the drive as dead, copy what you still can |
| Unknown | Reader could not talk to the drive | Usually a USB bridge or a controller fault, not a health result |
S.M.A.R.T. attributes worth watching
The four attributes that matter most on an HDD:
| Attribute | Healthy range | Reading it wrong |
|---|---|---|
| Reallocated Sector Count (05) | Stays flat for years | Any steady climb means sectors are dying |
| Pending Sector Count (197) | Zero | Above zero and rising means uncorrectable reads are queued |
| Uncorrectable Sector Count (198) | Zero | Anything above zero is a real data-loss risk |
| Power-On Hours (09) | No hard limit | Useful as a trend, not a verdict |
On an SSD, read Percentage Used and Media and Data Integrity Errors instead. A consumer SSD at 100% used is still usually fine; the failure mode is sudden rather than gradual.
4. Run a Surface Scan and Inspect Bad Sectors
Once the file system is clean, you can ask Windows to test every readable sector. Start with the fix pass:
chkdsk C: /fThen the surface pass, which is far slower on a mechanical drive — think hours on a large disk, not minutes:
chkdsk C: /rExpect one of two things. If the drive is idle and C: is in use, Windows tells you it cannot lock the volume and offers to schedule the scan for the next restart; say yes. If you run this on a system drive, the scan starts before Windows loads.
New bad sectors found and marked are serious. The drive is remapping around damage it can no longer read, and the spare pool is finite.
A second-hand drive deserves more than CHKDSK. A write-mode surface test finds damage that S.M.A.R.T. never reports, and on Windows the easiest route is the vendor’s own extended test — SeaTools Long Generic for Seagate, Samsung Magician’s full diagnostic, or the equivalent from Western Digital or Toshiba. On a spare machine, a Linux live USB with badblocks or FIO in destructive mode is the deeper option. Two warnings apply to both: some ports and enclosures report false positives on merely slow sectors, and a full scan can push a marginal drive into thermal throttling partway through, so watch temperature.
5. Check Free Space, Events, and Performance Signs
The last checks are the ones that catch a problem Windows has not flagged. First, free space. Keep an SSD above roughly 10 to 15 percent free; below that, write performance falls off and it looks like a dying drive.
Second, the event log. Open Event Viewer with eventvwr.msc and look under Windows Logs then System for sources Disk, Ntfs, storahci and volmgr. Or pull the recent entries from PowerShell:
Get-WinEvent -FilterHashtable @{LogName='System'; Level=2} -MaxEvents 30 | Where-Object {$_.ProviderName -match 'disk|Ntfs|storahci|volmgr'} | Select-Object TimeCreated, ProviderName, MessageRepeated errors from these sources, especially event ID 7 and 51, mean Windows is retrying reads that keep failing. Three or more of them on the same drive in a week is a replacement signal, not a repair signal.
Third, symptoms. A drive that disappears from BIOS or UEFI entirely, clicks or grinds during normal use, or takes ten minutes to reach the desktop is failing at the hardware level and no software check will change that. An external drive that keeps dropping off USB is more often the cable or the bridge chip in the enclosure than the drive itself — swap the cable before you condemn the disk.
CHKDSK switches and exit codes at a glance
| Switch | What it does | Writes to disk? |
|---|---|---|
| /scan | Online scan of a volume in use | No, read-only |
| /f | Fixes file-system errors on NTFS | Yes |
| /r | Locates every bad sector and marks them unusable | Yes, and slow on HDDs |
| /x | Forces the volume to dismount first | Yes |
| /b | Re-reads the whole volume to verify the repair, NTFS only | Yes |
Exit codes appear when you run CHKDSK from a script or a scheduled task:
- 0 — no errors found
- 1 — errors found and fixed
- 2 — cleanup performed, or the volume could not be locked
- 3 — errors found that could not be fixed
Code 3 is the one to act on. Anything non-zero and not 1 means something needs a closer look.
Common Mistakes
Treating a clean CHKDSK result as proof the drive is healthy. This is the big one. CHKDSK validates the file system structure, which can be perfectly intact while the platters beneath are decaying. A clean result means no logical damage, nothing more.
Confusing disk numbers with drive letters. Repairing D: when you meant Disk 1 is how people discover they formatted the wrong volume. Confirm the mapping in Disk Management before running anything that writes.
Downloading diagnostic tools from a search ad instead of the vendor. Fake CrystalDiskInfo and fake SeaTools installers are a well-worn malware route. Type the vendor address yourself.
Skipping the backup. Every repair pass writes to a drive that is already unwell. If the disk dies mid-write, the file system repair becomes a data loss.
Running an intensive surface scan on a drive that is already failing. A multi-hour /r scan on a clicking drive can finish it off. Back up, or let the drive cool between passes.
Believing OK from one built-in check means you can stop looking. Windows reports OK until an attribute crosses a threshold, which on many drives happens after real degradation has started.
Ignoring the cable and enclosure on external drives. A large share of the “failing USB drive” reports that reach support forums are a marginal cable or a bridge chip. It costs nothing to test with a second one.
Frequently Asked Questions
What is the best way to check hard drive health on Windows?
Use a layered check: run chkdsk C: /scan in an elevated terminal to rule out file system errors, then read S.M.A.R.T. with Get-PhysicalDisk | Get-StorageReliabilityCounter in PowerShell for the hardware picture, and install CrystalDiskInfo if you want individual attributes such as reallocated and pending sector counts. Each layer catches something the others miss, and none of them repair physical damage.
Does Windows Check Disk check the physical hard drive?
Only partly. CHKDSK validates and repairs the file system structure on top of the media, and the /r switch also reads through every sector looking for unreadable ones. But it cannot test surface quality, and it cannot restore data from a sector it cannot read. A drive can pass CHKDSK cleanly and still be failing mechanically.
What does a S.M.A.R.T. Caution or Failure status mean?
Caution means at least one attribute has crossed the manufacturer’s pre-failure threshold. Failure means one has crossed the point where the drive is considered broken. Caution is easy to ignore and should not be: those sectors usually work fine until they land on real data. In both cases, back up and plan a replacement rather than continuing to use the drive.
Can I check hard drive health on an SSD in Windows?
Yes, and the same tools work. CrystalDiskInfo and PowerShell both read NVMe and SATA SSDs, but judge them by different attributes: watch Percentage Used, Media and Data Integrity Errors, and Available Spare rather than reallocated sectors. Note that chkdsk /r adds write cycles, which slightly shortens SSD life, so skip the surface scan on flash unless you have a specific reason.
What should I do if my hard drive reports bad sectors?
Back up everything you can read, starting with the files that cannot be replaced. Then stop running repair scans, because they add write stress to a drive that is already failing. A small, static count of reallocated sectors on an otherwise quiet drive is often survivable; a climbing count, any pending or uncorrectable sectors, or clicking noises mean you should replace the drive rather than keep monitoring it.
How can I tell whether a Windows disk problem is hardware or software?
If chkdsk finds file system errors and fixing them stops the problem, it was logical. If S.M.A.R.T. attributes are climbing, the drive drops out of BIOS or UEFI, or you hear clicking and grinding, it is physical. The clearest test is the noise: software faults are silent. Hardware faults that matter announce themselves audibly or by vanishing from the device list entirely.
Conclusion
Copy your important files off first, every time — it is the step that saves you when the rest goes sideways. Then confirm which physical drive you are testing, run chkdsk with the /scan switch from an elevated terminal, and read S.M.A.R.T. through PowerShell and CrystalDiskInfo. Knowing how to check hard drive health on Windows is a ten-minute job once you know the order to do it in.
If the drive reports physical failure, climbing reallocated or pending sectors, repeated disk errors in Event Viewer, or makes any noise at all, replace it. No diagnostic tool repairs failing hardware, and a drive that has already begun losing sectors will not stop on its own.