To install Docker on Windows with WSL2, you confirm hardware virtualization is on, run wsl --install from an elevated PowerShell window, install Docker Desktop and select the WSL 2 based engine, then enable WSL integration for your Linux distribution and run docker run hello-world. Most people get through it in 15 to 30 minutes, and the part that stalls almost everyone is virtualization, not Docker.
This guide walks through the Docker Desktop route, which is the one to use for most Windows developers. Each step tells you how to tell it worked, so you can stop guessing when a command hangs. I have written out the exact error strings in the troubleshooting section because that is where the wasted hours usually go.
A note on scope: Windows containers are a separate thing from Linux containers, and WSL2 only runs the Linux kind. If you need to containerize a Windows application, you need the Windows container mode, which lives outside WSL2. That comes up in the FAQ.
Table of Contents
- What You Need
- Step-by-Step: How to Install Docker on Windows With WSL2
- 1. Check Windows Version and Virtualization Support
- 2. Install or Enable WSL2
- 3. Install Docker Desktop for Windows
- 4. Configure Docker Desktop to Use WSL2
- 5. Verify Docker and Run a Test Container
- 6. Confirm the WSL2 Backend Is Active
- Common Mistakes
- Frequently Asked Questions
- Do I need WSL2 to run Docker Desktop on Windows?
- Can I use Docker with WSL2 instead of installing Docker Desktop?
- Why does Docker Desktop show that virtualization is not enabled?
- How do I switch Docker Desktop from Windows containers to Linux containers?
- Can I install Docker inside a WSL2 Ubuntu distribution?
- Where are Docker Desktop files and images stored when using WSL2?
- Conclusion
What You Need
You need a machine that can run a lightweight virtual machine, because that is what WSL2 actually is under the hood. Here is the checklist before you download anything.
- Windows 10 version 21H2 or Windows 11, Home or Pro. Older builds and Windows 8 are out.
- Hardware virtualization enabled in firmware: Intel VT-x or AMD-V.
- Administrator rights on your Windows account.
- About 10 GB of free disk space for Docker Desktop, images and layers.
- A Windows account with a real password, if you plan to use Windows containers or the Hyper-V backend.
- The Windows Subsystem for Linux optional features: WSL and Virtual Machine Platform.
- A Linux distribution such as Ubuntu for a working Docker CLI.
- PowerShell or Windows Terminal, and comfort with command lines.
Check the virtualization state before anything else. Open Task Manager with Ctrl+Shift+Esc, go to the Performance tab, click CPU, and read the line that says Virtualization. It should say Enabled. If it says Disabled, you need to enter the BIOS or UEFI setup and turn on Intel Virtualization Technology, VT-x, or SVM Mode, depending on your CPU vendor.
Windows Home editions work fine. Docker Desktop supports WSL2 on Home, and the WSL 2 backend does not require a Pro license. What Home lacks is the Hyper-V role, which is why this guide stays on the WSL2 backend.
Step-by-Step: How to Install Docker on Windows With WSL2
1. Check Windows Version and Virtualization Support
Confirm your Windows build is current and virtualization is on before installing anything. Right-click the Start button, choose Settings, then System, then About, and read the Windows specifications line at the bottom.
You can also check virtualization from an elevated PowerShell window:
systeminfoScroll to the Hyper-V Requirements section near the bottom. All four lines should read Yes. If the Virtualization Enabled line says No, the fix is in firmware, not Windows.
If you cannot open an elevated PowerShell window at all, that is a separate account policy problem and no Docker install will get past it. Fix the admin access first.
2. Install or Enable WSL2
Open PowerShell as Administrator, right-click Start, PowerShell, Run as administrator, then run one command:
wsl --installThat single command enables the WSL optional feature, the Virtual Machine Platform feature, installs the WSL2 Linux kernel and sets version 2 as the default, then installs Ubuntu. Restart Windows when it finishes, because the Virtual Machine Platform feature needs a reboot before the kernel will load.
After the reboot, run an update so your kernel is not the older bundled one:
wsl --update
wsl --set-default-version 2
wsl --install -d Ubuntu
If your machine already had WSL installed with version 1 as the default, wsl --set-default-version 2 switches future distributions to version 2. Existing distributions keep whatever version they were created with, so convert those separately with wsl --set-version Ubuntu 2.
Verify with the version list. The VERSION column should read 2:
wsl -l -vIf the Microsoft Store is blocked on a work machine, the DISM route still works. From an elevated PowerShell window:
dism.exe /online /enable-feature /featurename:Microsoft-Windows-Subsystem-Linux /all /norestart
dism.exe /online /enable-feature /featurename:VirtualMachinePlatform /all /norestart
Reboot, then run wsl --update and install the kernel package manually from the Microsoft WSL releases page if wsl --install still stalls.
3. Install Docker Desktop for Windows
Download Docker Desktop for Windows from docker.com, run the installer as administrator, and accept the defaults with one exception. When the installer offers a choice between WSL 2 and Hyper-V, pick WSL 2. Choosing Hyper-V on Windows Home fails, and on Pro it adds a second backend you do not need here.
The installer takes a few minutes and restarts WSL when it finishes. On first launch, Docker Desktop may ask you to sign in. Skipping the sign-in is fine for local development; the paid licence tiers exist for business features like organization-wide policy and image access, and a large company should look at those terms before standardizing on it.
4. Configure Docker Desktop to Use WSL2
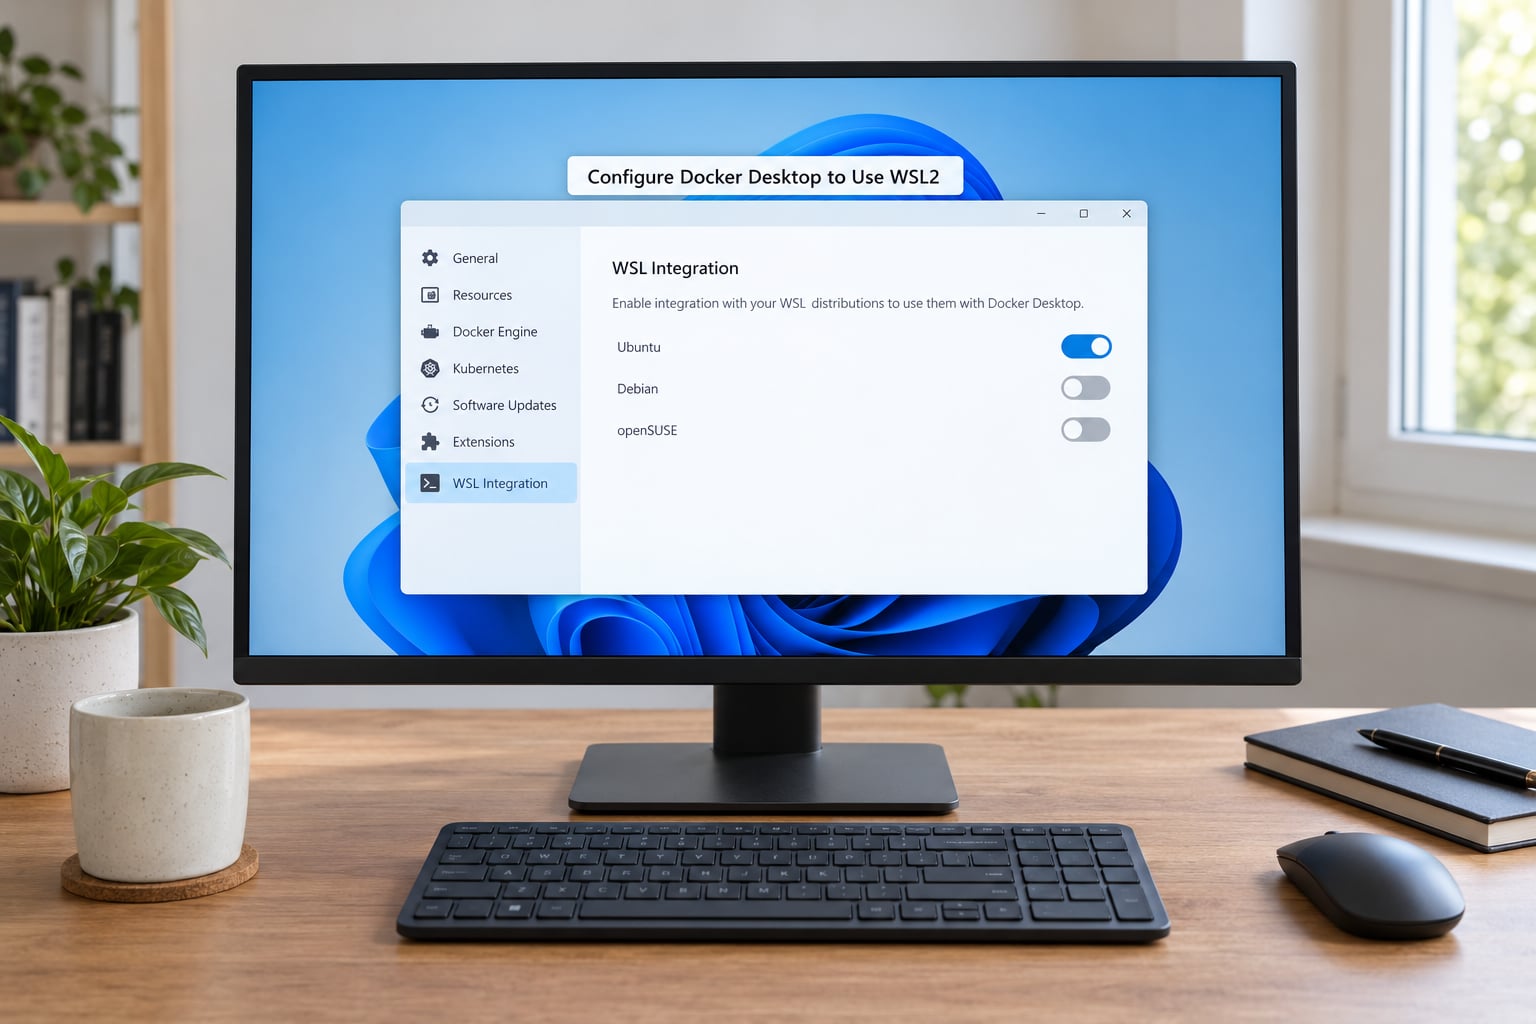
Open Settings from the gear icon in the top right of Docker Desktop. In the General tab, tick Use the WSL 2 based engine. This is the single most important setting in the whole guide, because without it Docker Desktop falls back to its own Hyper-V based virtual machine and you lose the shared kernel and the disk performance that make WSL2 worthwhile.
Then open the Resources tab and select WSL Integration. You get a list of your installed Linux distributions with a toggle each. Turn on integration for every distribution you plan to use Docker from, usually Ubuntu. Apply and restart when prompted; Docker Desktop restarts its engine and your WSL shell will briefly drop.
After the restart, run this in PowerShell to confirm the backend distribution exists:
wsl -l -vYou should now see a distribution named docker-desktop running version 2. That distribution holds the Docker engine itself. Your Ubuntu distribution is where the docker CLI lives, and the integration toggle is what lets it talk to the engine.
5. Verify Docker and Run a Test Container
Open your Ubuntu terminal, either from the Start menu or with wsl -d Ubuntu from PowerShell, and check the client:
docker --versionThen run the test image:
docker run hello-worldA working install prints Unable to find image locally, then a pull progress line, then a block of text starting with Hello from Docker! followed by a short explanation of what you just did and a note that this is a test image. If you see that block, the daemon is reachable, the image pulled and the container ran to completion.
If the docker command is not found in Ubuntu but works in PowerShell, integration is off for that distribution. Go back to Resources, WSL Integration and toggle it on. The shell must be restarted to pick up the change.
6. Confirm the WSL2 Backend Is Active
Verify the operating system the engine reports, which is the fastest way to know you are on the WSL2 backend and not a Hyper-V machine:
docker infoLook at the OSType line. It should read linux. Scroll further for Kernel Version, which should show a Microsoft WSL2 kernel build, and Server Version, which is your Docker Engine version. The Docker root directory on the WSL2 backend points inside the Linux file system rather than a Windows drive.
Run a real Linux image as a second check:
docker run --rm alpine uname -aThe output shows a Linux kernel string with a microsoft-standard-WSL2 marker. Now check the container mode toggle in the Docker Desktop tray icon. If it reads Switch to Linux containers, you are already on Linux containers. If it reads Switch to Windows containers, click it to come back. Linux containers is what this entire guide assumes.
Common Mistakes
Here are the errors people hit most, with the exact text to search your screen for.
Docker Desktop says virtualization is not enabled. This is the top one, usually reported on forums like r/wsl2 and r/bashonubuntuonwindows. Task Manager, Performance, CPU will show Virtualization: Disabled. Turn on Intel VT-x or AMD SVM in the BIOS, save, and reboot. Also confirm the Virtual Machine Platform Windows feature is on.
The WSL Integration tab is missing from the Resources section. When the Resources page only shows CPU, Memory and Disk, the WSL 2 backend is off. Tick Use the WSL 2 based engine in the General tab and restart Docker Desktop. On older Docker Desktop releases the tab appears only after the engine is switched.
WSL2 requires an update to complete the installation. Usually appears right after enabling features. Run wsl --update in an elevated PowerShell window. If that errors, install the WSL2 Linux kernel update package from the Microsoft WSL releases page manually.
Got permission denied while trying to run Docker daemon. This one comes from a native Docker install inside a distribution, not Docker Desktop. Add your user to the docker group with sudo usermod -aG docker $USER, then log out and back in. If you keep running docker through sudo, you will rebuild file permissions inside mounted volumes as root, which then breaks your host files.
Builds are painfully slow. The usual cause is your source code sitting on /mnt/c, the Windows drive mounted into Linux. Bind mounts across that boundary cross a translation layer on every file operation. Keep the project in the Linux file system, under ~/code or similar, and bind mount in only what Windows needs to see. Also check the memory limit Docker Desktop ships with. It is lower than most machines, and raising it in Settings, Resources, Advanced is a common early fix.
Containers have no network, or the daemon will not start. Check that you have not set 0.0.0.0/8 in /etc/docker/daemon.json as an insecure registry default on a native install, which breaks container networking on many setups. On Docker Desktop, restart the engine from the Troubleshoot menu.
Disk or memory errors during install. Docker Desktop needs roughly 10 GB free before it will install, and images add up quickly. Clear space first, then retry.
Frequently Asked Questions
Do I need WSL2 to run Docker Desktop on Windows?
Yes, on current Docker Desktop versions WSL2 is the recommended backend and on Windows Home it is the only supported one, because Home has no Hyper-V role. WSL2 lets containers share the Windows kernel, so builds are faster and disk use is lower than a Hyper-V virtual machine. WSL2 also needs hardware virtualization switched on in your BIOS.
Can I use Docker with WSL2 instead of installing Docker Desktop?
You can. Install the Docker Engine packages directly inside a WSL2 distribution such as Ubuntu and the daemon runs under the WSL2 kernel with no Desktop app at all. It is the route people pick to avoid the Desktop licence and its background resource use. The tradeoff is that you manage the daemon yourself, including starting it on WSL launch.
Why does Docker Desktop show that virtualization is not enabled?
Docker Desktop relies on WSL2, which needs Intel VT-x or AMD-V turned on in firmware. Open Task Manager, go to Performance and CPU, and read the Virtualization line. If it says Disabled, reboot into your BIOS or UEFI setup and enable Intel Virtualization Technology or SVM Mode. If it says Enabled and Docker still complains, update Windows and run wsl u002du002dupdate.
How do I switch Docker Desktop from Windows containers to Linux containers?
Use the tray icon in the Windows notification area. It shows the current mode, and clicking it switches between Windows containers and Linux containers. WSL2 only runs Linux containers, so select Linux containers for anything covered in this guide. Switching modes restarts the engine, so running containers stop and you rerun them afterwards.
Can I install Docker inside a WSL2 Ubuntu distribution?
Yes, and plenty of developers do exactly that. With Desktop running, keep WSL integration on for Ubuntu so the CLI already points at the Desktop engine. If you want a separate engine with no Desktop app, uninstall Docker Desktop first, then install the docker-ce packages from Docker’s apt repository inside Ubuntu and add your user to the docker group.
Where are Docker Desktop files and images stored when using WSL2?
On the WSL2 backend, images, containers and volumes live in the Linux file system inside the docker-desktop distribution rather than as loose files on a Windows drive. You can move the data location from Settings, Resources, Advanced, and change how much RAM and disk Docker Desktop may use in the same place. Raising the memory limit from the default is a common early fix for slow builds.
Once hello-world runs, the next thing worth setting up is a Compose file for anything with more than one container, and a project folder that lives inside the Linux file system rather than on a Windows drive.
Conclusion
Start with Windows Update, then open Task Manager and confirm virtualization reads Enabled. Run wsl --install from an elevated PowerShell window, reboot, and check wsl -l -v shows version 2. Install Docker Desktop with the WSL 2 backend, tick Use the WSL 2 based engine, then switch on WSL integration for your distribution. Finish with docker run hello-world and you are set. If it printed the Hello from Docker! block, Docker is running Linux containers on the WSL2 backend and ready for real work. Updated for 2026.